Tutorials
Tutorial Contents
- Maintaining O-Rings
- Finding The Leak
- Bringing O-Rings back to life
- Finding The Correct Replacement O-Rings
- Replacing The Valve Output O-Rings Guide
O-Rings are consumable parts which everyone at some point should expect to replace so its important at an early stage of owning a gas blow back gun to get familiar with the consumable parts of your gun so you can have a supply ready as there is nothing worse than checking your kit the night before an airsoft game only to find that you have a leaking magazine.
Maintaining O-Rings
Maintaining O-Rings is a relatively simple process and there are a few things you can do to prolong the life of the O-Rings in your magazine such as always making sure that you leave some gas in your magazine. You can buy maintenance gas such as Abbey Predator 144a Maintenance Gas which is basically just propane with higher amounts of silicone mixed in. I recommend not getting this gas as it's not cost effective and instead purchase something like WE 2.0 Green Gas which contains around three times as much gas for a lower price and it works just as well. Finally never release all of the gas from your magazine at once as this will freeze your O-Rings. I often see people at the end of day releasing all of the gas from their magazines as they believe this is a better way of storing them but all this is doing is reducing the life of the O-Rings or even causing leaks. There are times where you might want to release the gas from your magazines such as if you're running standard propane which will dry out your O-Rings and if this is the case the gas should be released in short bursts to ensure that the O-Rings don't freeze.
From my experience the O-Rings that tend to fail the most are the ones on the gas output valve. There are additional O-Rings which sit around the gas tube caps and one around the gas inlet valve. These O-Rings however don't go through the same amount of pressure and temperature changes that the O-Rings on the gas output valve so replacement of these O-Rings is minimal and in some cases never required.
Finding The Leak
Finding where the leak is coming from is pretty simple, usually you will hear a hissing noise coming from the magazine or even a popping sound, if you move the magazine around close to your ear you will be able to hear exactly where the leaking is coming from. If you're still unsure then the next option is to just put your magazine in a bucket of water, give your magazine a spin around in the water to allow for any air bubbles to escape and you should then be able to see the bubbles from the escaping gas.
Bringing O-Rings Back To Life
Bringing O-Rings back to life is possible using GHK Silicone Oil. Silicone oil is great for O-Rings because usually leaks are simply caused by the O-Rings drying out so a light covering with this oil will be absorbed and the O-Rings will resume to being airtight. How you apply the oil is also important, a mistake I made when starting out was feeding the silicone oil down the gas guide of the magazine and then pressing the gas output valve to allow the silicone oil to enter the valve and work its magic on all of the O-Rings. This method gets results there were many magazines which I fixed leaks on quickly but it's only a short win because now you have a magazine which is full of sticky silicone oil so now when you go to fire your gun then all of this silicone oil is going to make its way into your hop up chamber and barrel and this is the last place you want to be adding a lubricant. The correct method is to remove the gas output valve using a GHK Valve Tool and then lubricate the O-Rings and then wipe off the excess oil.
For newer GHK magazines the material used in the o-rings is fairly sturdy and for the ones that have failed, trying to use Silicone Oil to bring them back to life does not work and the only solution is to replace the o-ring all together.
Finding The Correct Replacement O-Rings
Luckily getting replacements is easy, you can get them from Samoon a cheaper method would be to buy a handy set from Lee's Precision. The O-Rings are cross compatible with all GHK magazines so at present that covers the GHK AK, AUG, G5, Glock, M4, SIG 553.
- Gas Output Valve O-ring Set - Part: GAS-VA-ORN
- O-Ring Repair Kit For GHK AK, M4 & G5 Magazines - Part: VRK-009
Replacing The Valve Output O-Rings Guide
Step 1: Tools Required - Small Flat head screwdriver, GHK Valve Tool, Pliers
Step 2: Using the GHK Valve Tool, remove the gas output valve, you may need to use your pliers to pull out the valve if one of the O-Rings has got stuck in the threads. Once the valve is out be sure to remove any broken O-Rings from within the magazine as you don't want this causing a jam later down the line. Additionally, use this opportunity to clean the inside of your magazine and get rid of any crud around the threads, I use cotton buds to do this but a paper towel or cloth would work just as well.
Step 3: Using your small flat head screwdriver pry off the small E clip on the valve, this shouldn't require much force. Once the E clip is off there is a small washer which sits just below the E clip. Using your fingers give it a wiggle and pull upwards and it will slide off the silver post.

Step 4: Now you will have access to the first O-Ring which is the smallest and thickest of the O-Rings. You should be able to just press the valve inwards and then use your fingers to get a grip around the O-Ring and put it off. When this O-Ring is removed the silver post will be able to come out of the brass shell.

Step 5: Remove the grey O-Ring from the silver post. For this I find that pinching the O-Ring and using your small flat head screwdriver to hook the O-Ring out is the best method of removing the O-Ring. Once it's off, use this opportunity to give the silver post a good clean.


Step 6: Install the replacement O-Ring on the silver post, be sure that the replacement is the same size and colour (grey) as the one that was removed. Once that's done put the spring back onto the silver post.

Step 7: Remove the O-Rings from the brass shell of the gas output valve, again you can use the method of pinching the O-Ring and using your small flat head screwdriver to hook the O-Rings off. Once the O-Rings have been removed give the brass shell a good clean.
Step 8: Replace the O-Rings on the brass shell, the larger O-Ring from the replacement kit will go at the top of the threads and then the medium sized one will sit just over the first lip. I would recommend keeping hold of the O-Rings that you remove for now just so you can match up the replacements.

Step 9: Push the silver post back through the brass shell and this part is fairly tricky as you need to install the small thick O-Ring back onto the silver post.
Step 10: Push the washer back onto the silver post and then put the E clip back onto the silver post, you will see a small grove in the silver post for the E clip to go back into and this will be just above the washer. I recommend getting the E clip in position and then using your pliers you can squeeze the E clip back into position.
Step 11: Before installing the valve output back into the magazine, it is a good idea to give the O-Rings a light coating of Silicone Oil. Be sure to wipe off any extra oil as you don't want this ending up in your hop up or inner barrel.
Step 12: The final step is to install the valve output back into the magazine Using the GHK Valve Tool,, don't over tighten when screwing the valve back into the magazine as this will just put pressure onto the O-Ring that sits at the top of the threads.

Tutorial Contents
- Why you should replace a broken feed lip
- Spotting a feed lip that needs replacing
- Finding the correct replacement part
- Replacing the feed lip GHK G5 / GMAG
- Coming Soon * Replacing the feed lip GHK AK74
- Coming Soon * Replacing the feed lip GHK M4 Stanag
- Coming Soon * Replacing the feed lip GHK 553
Why you should replace a broken feed lip
Failure to replace broken feed lips can result in double feeds, this is because if there is a crack in the feed lip the amount of pressure applied to keep the BB's in place is less. A double feed basically means that the magazine releases more than one round into your gun. This will normally mean that one BB will end up where it's supposed to but the other be blocked. This BB will then be hit / crushed by the nozzle which can result in a broken nozzle, broken hop unit or even a bent barrel.
Spotting a feed lip that needs replacing
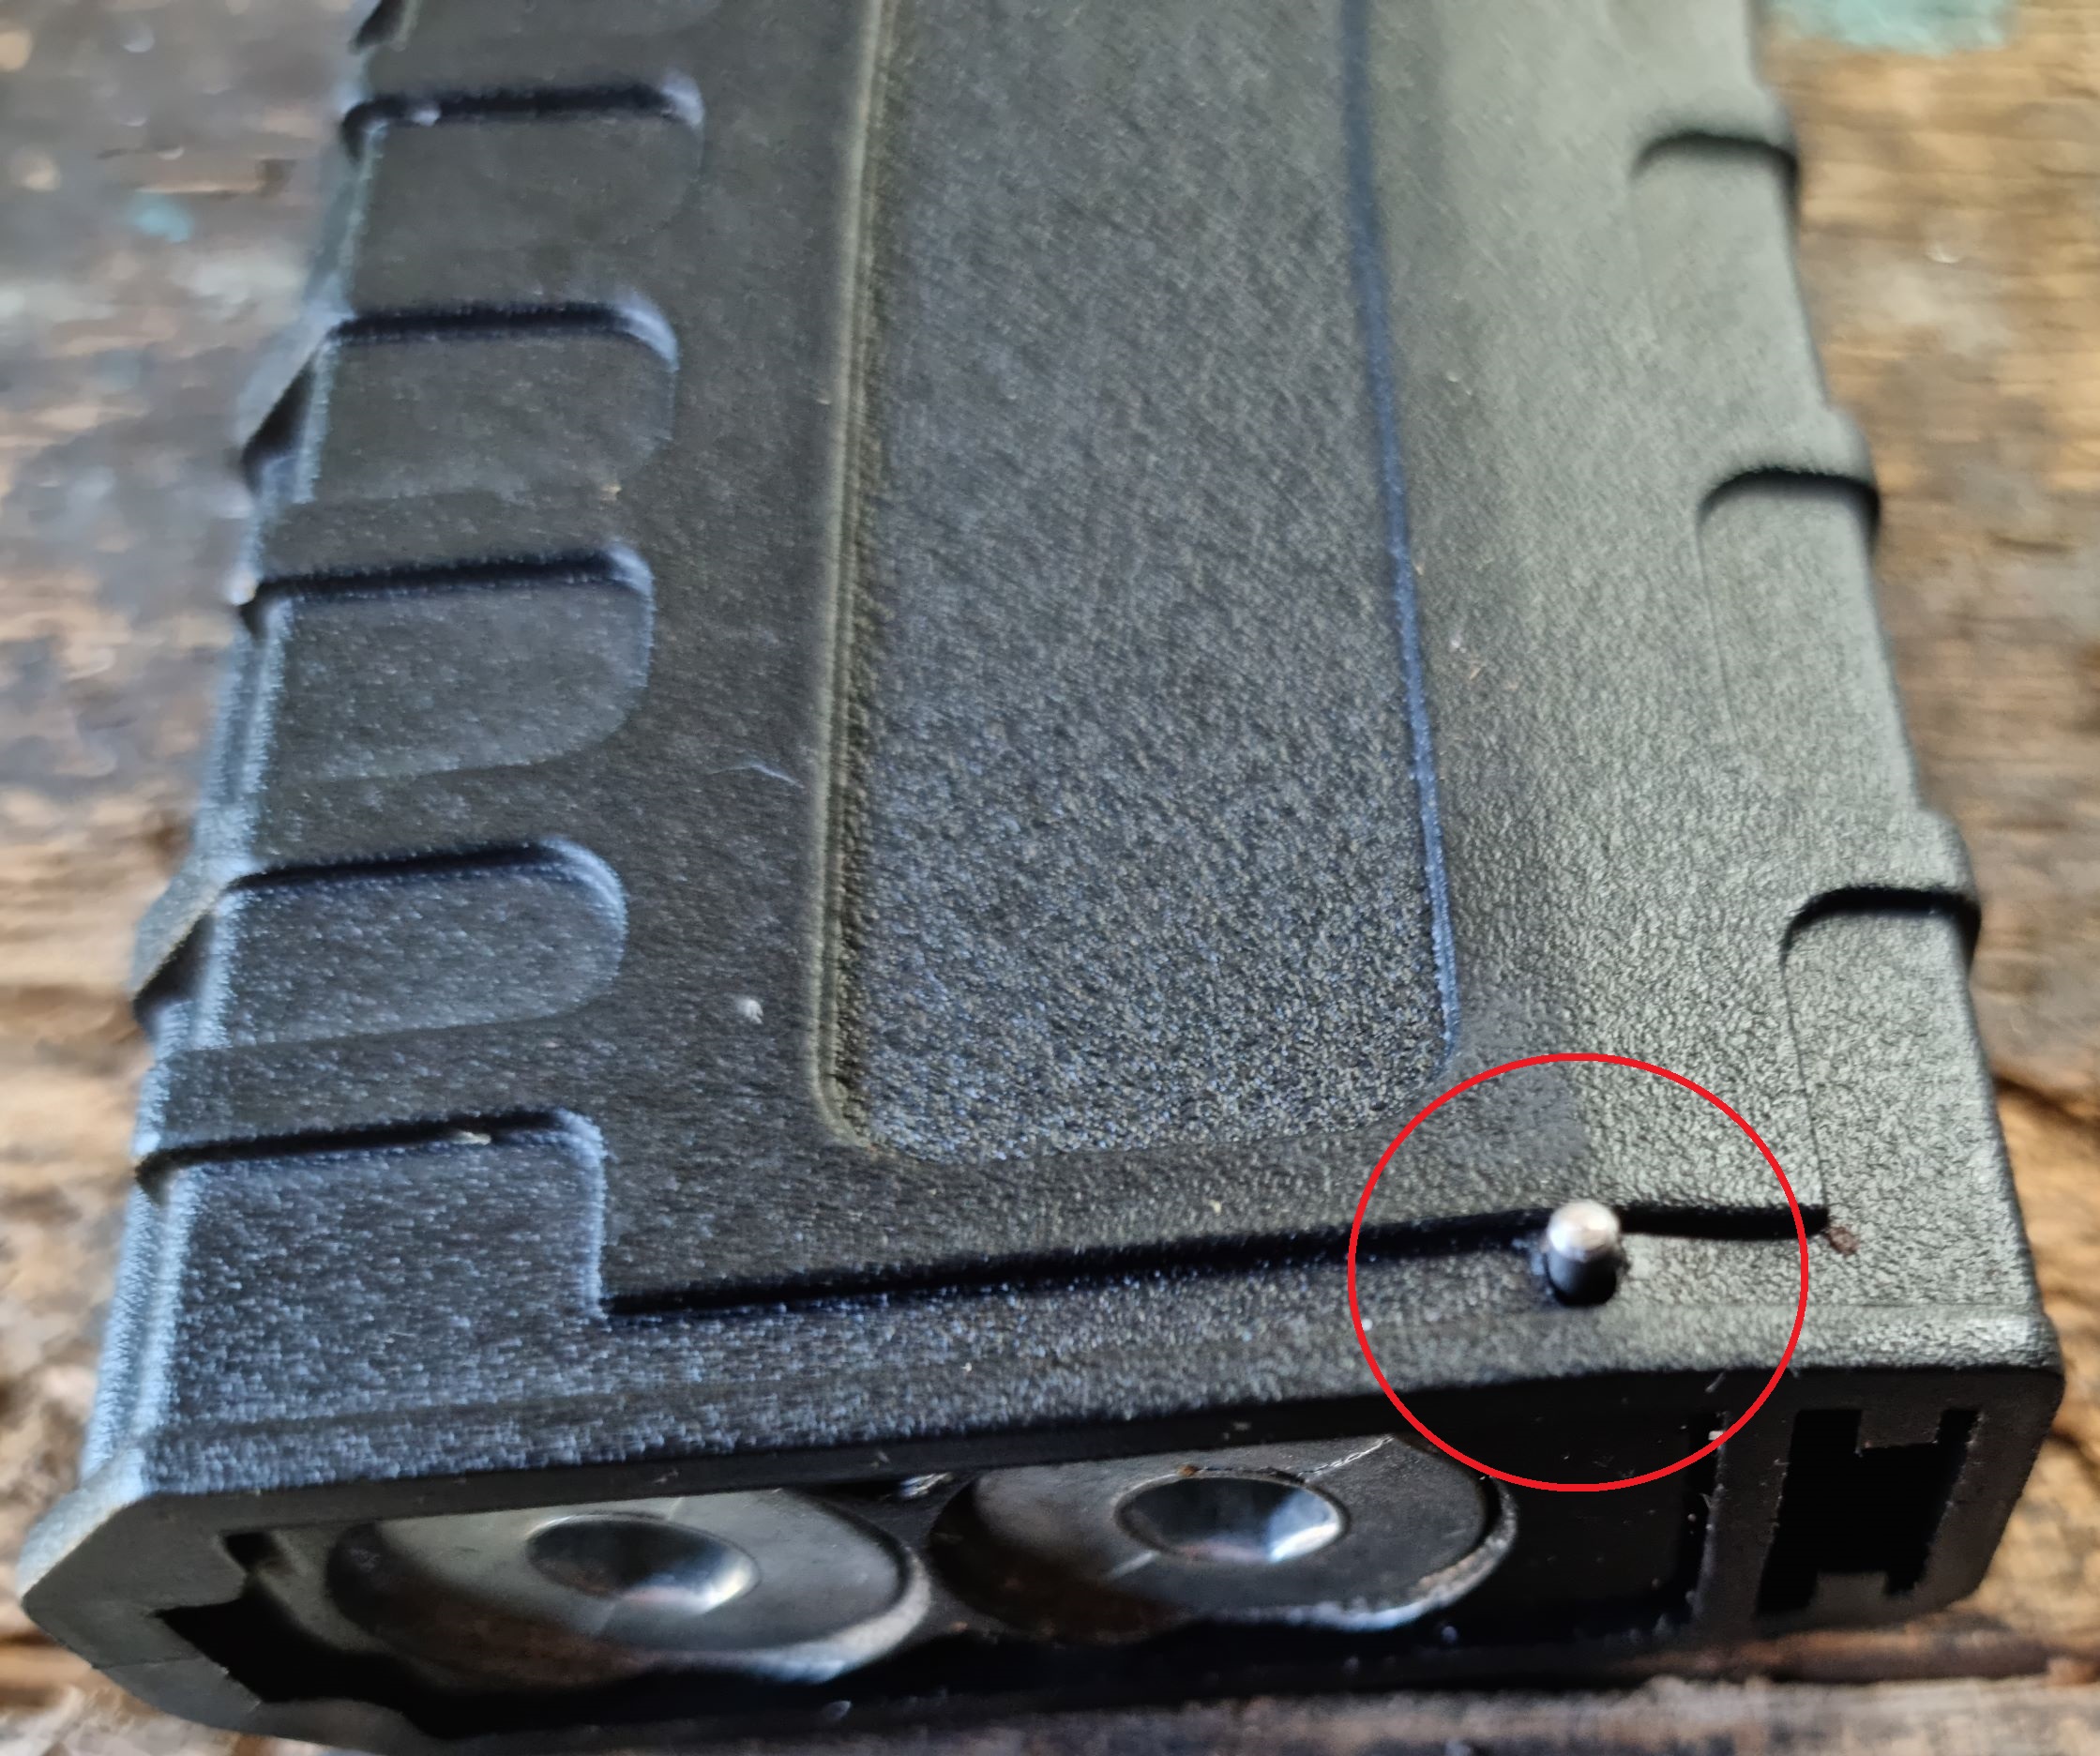
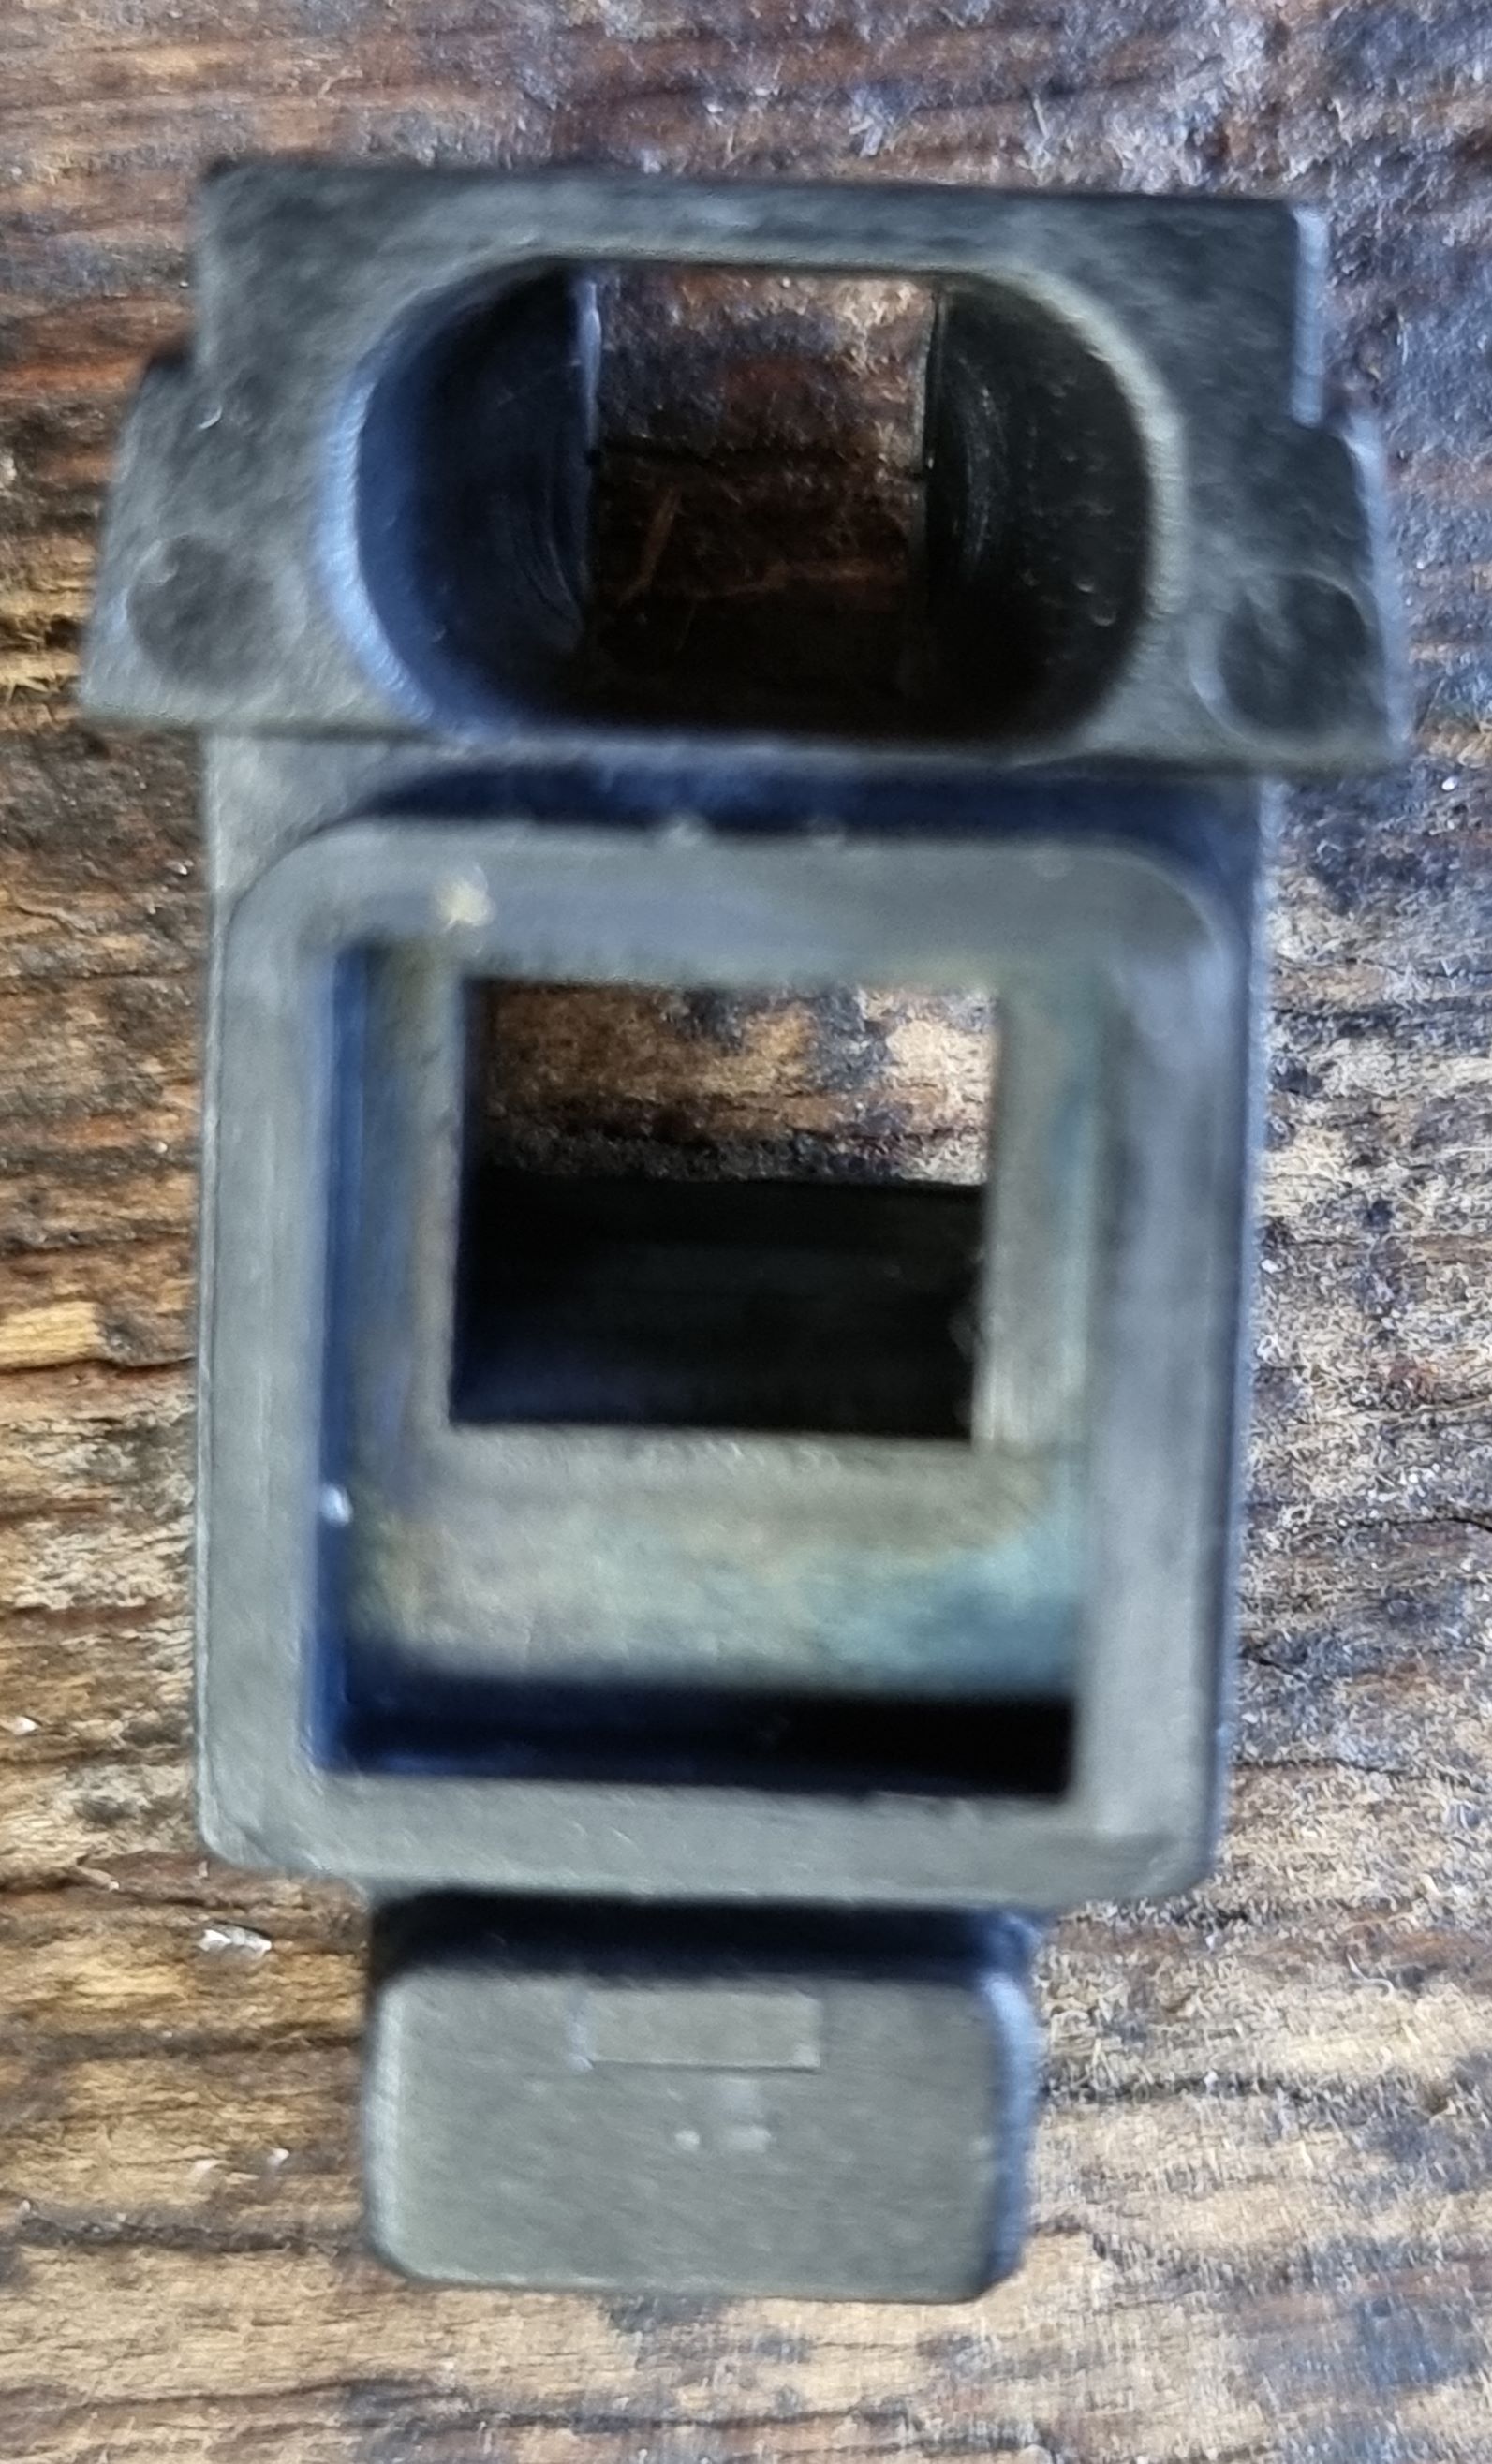
Examine the feed lips closely and look for any cracks, in the picture below you can see that there is a hairline crack that goes from top to bottom. To begin with this crack may only extend half way down, if it does then it still needs replacing. You can click the image to get a closer look.
Finding the correct replacement part
Not all of the GHK magazines use the same feed lips so it is important that you obtain the correct one for the type of magazines that you own. The list below provides links to the parts from the Samoon website which always tend to have a good supply of parts. You can always try searching for web sites in your home country as supply could vary but in the UK Samoon tend to be the best option.
Here is a list of parts for the currently available magazines:
- AK74 - Modern AK Magazine - Part: GKM-11-2-1
- AKM - Old Style AK Magazine - Part: GKM-11-2
- G5 / M4 - Plastic GMAG - Part: G5-GMAG-04
- AUG - Single Style - Part: AUG-M-04
- 551 / 553 - Single Style - Part: 553-M-03
Replacing the feed lip GHK G5 / GMAG
Step 1: Tools Required - Pliers, Rubber Mallet, Small Pin Punch, Large Pin Punch
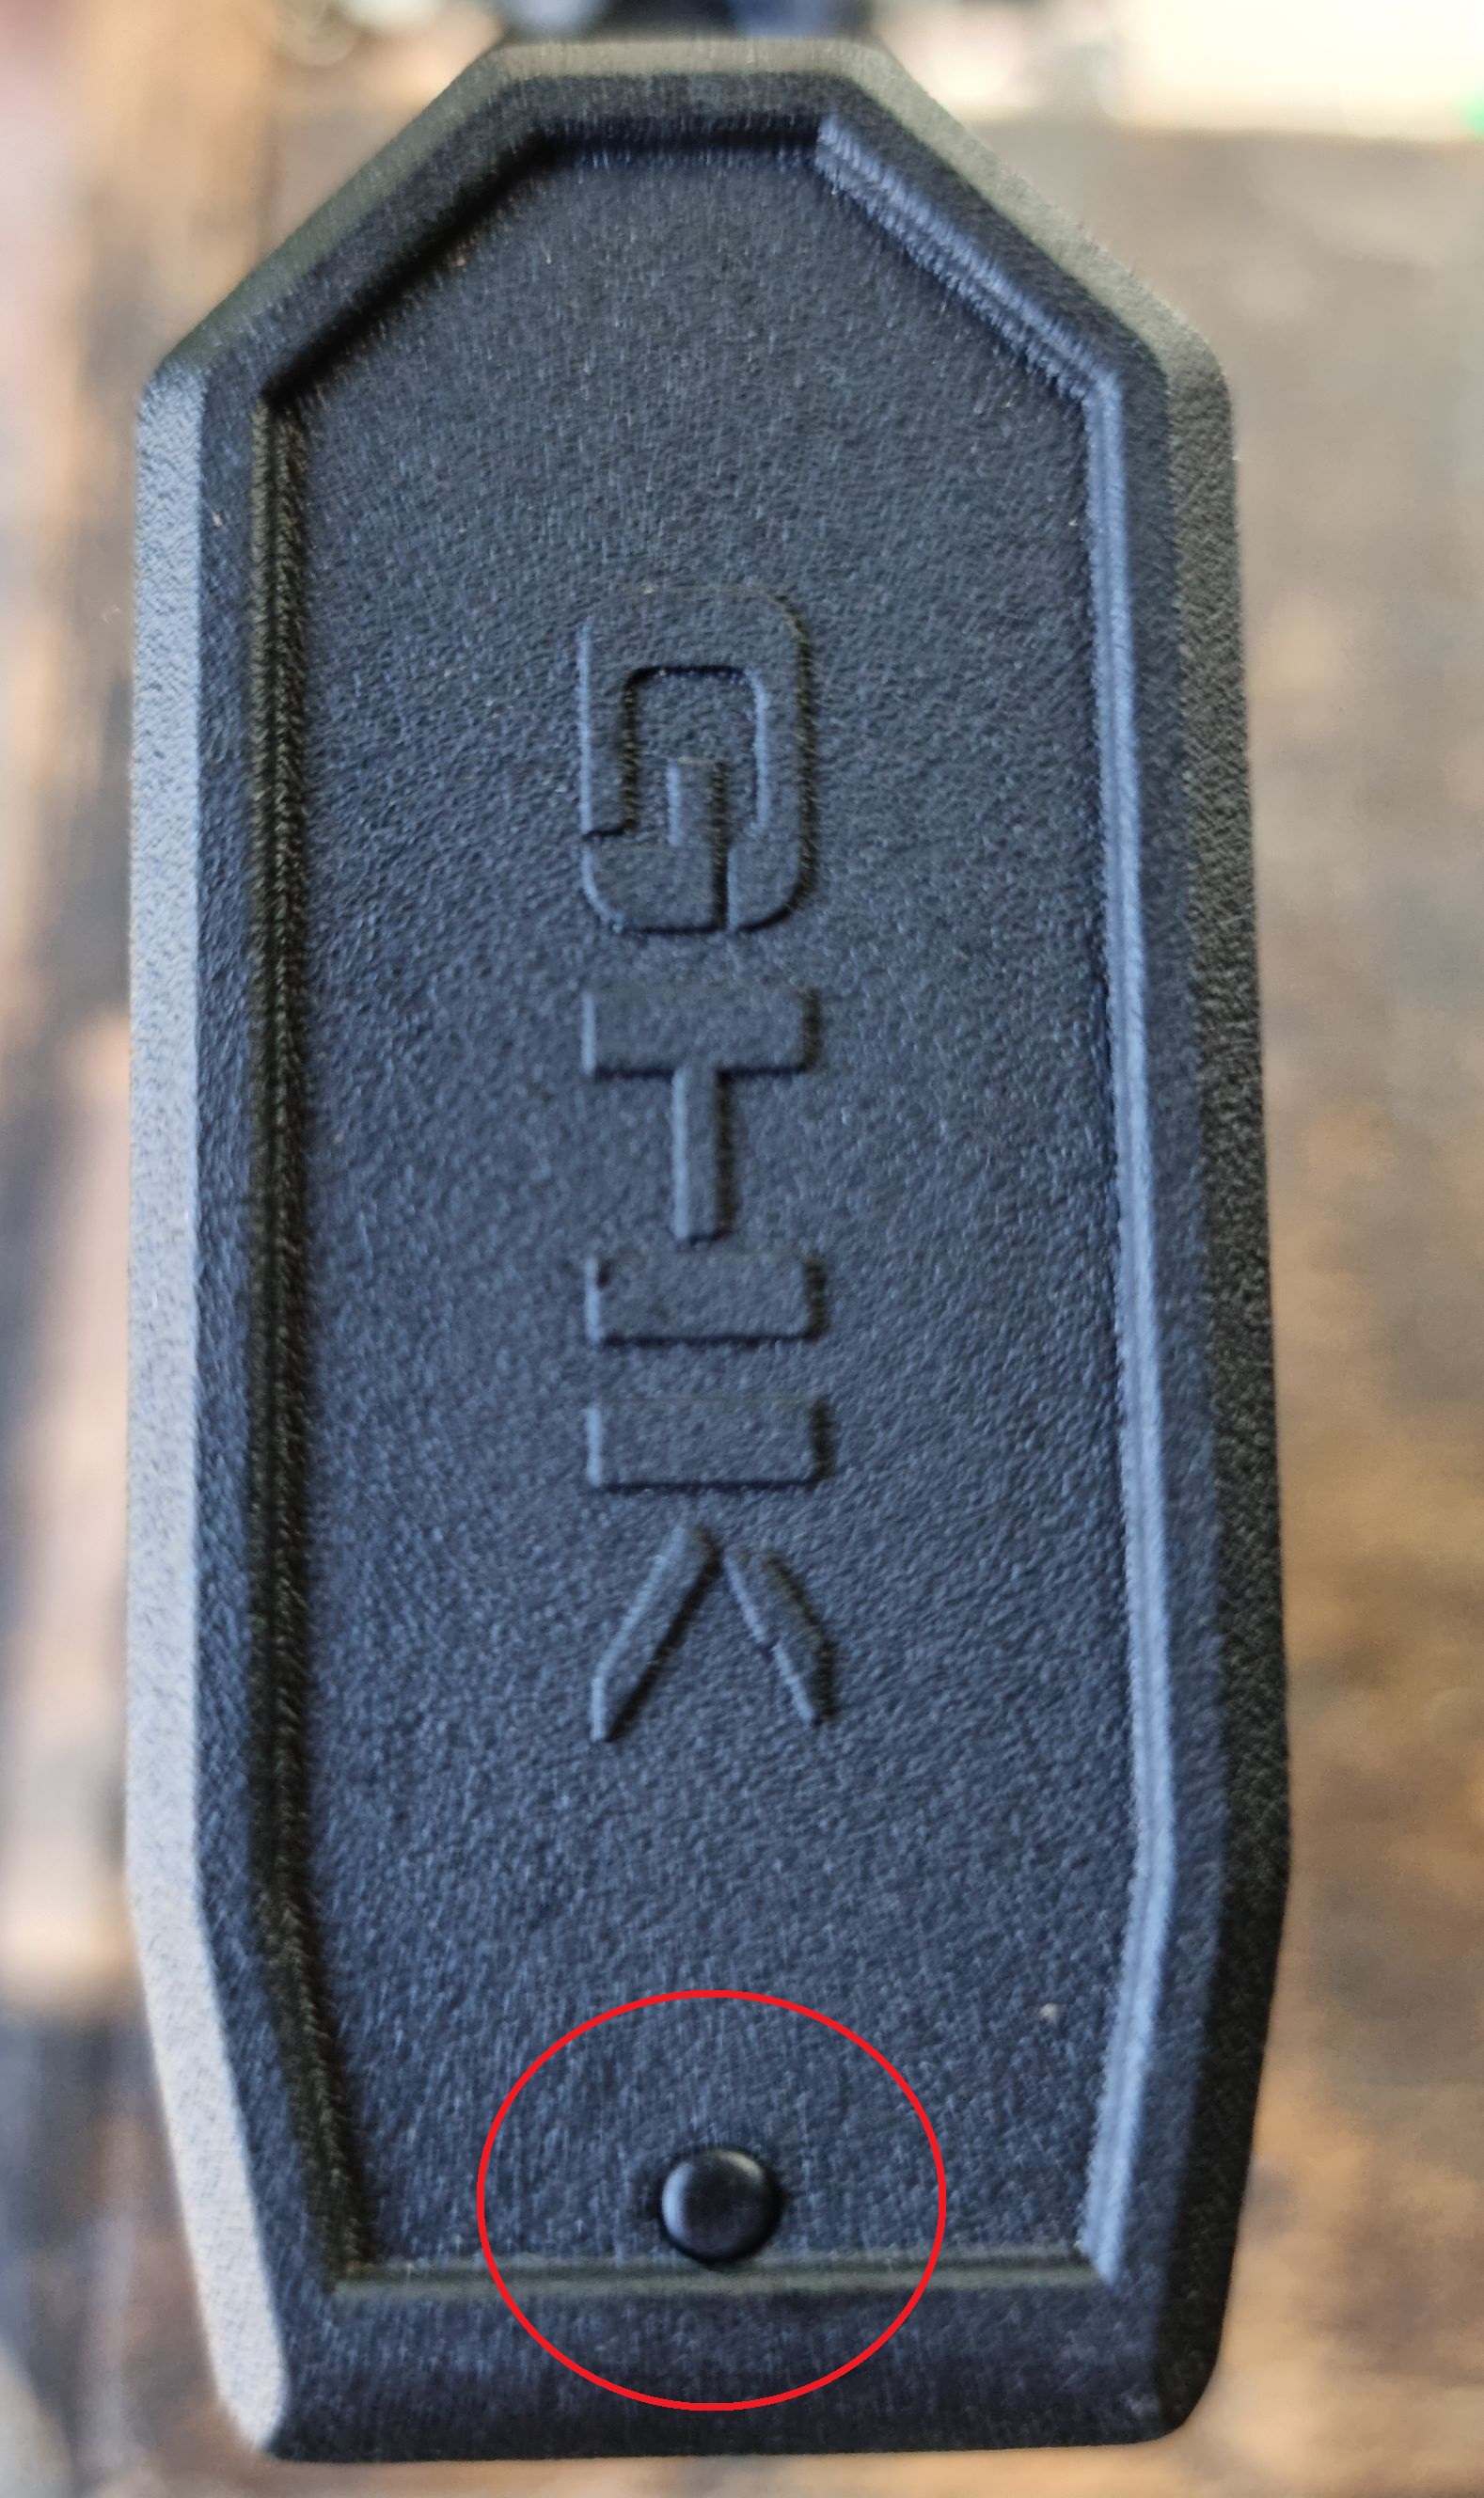
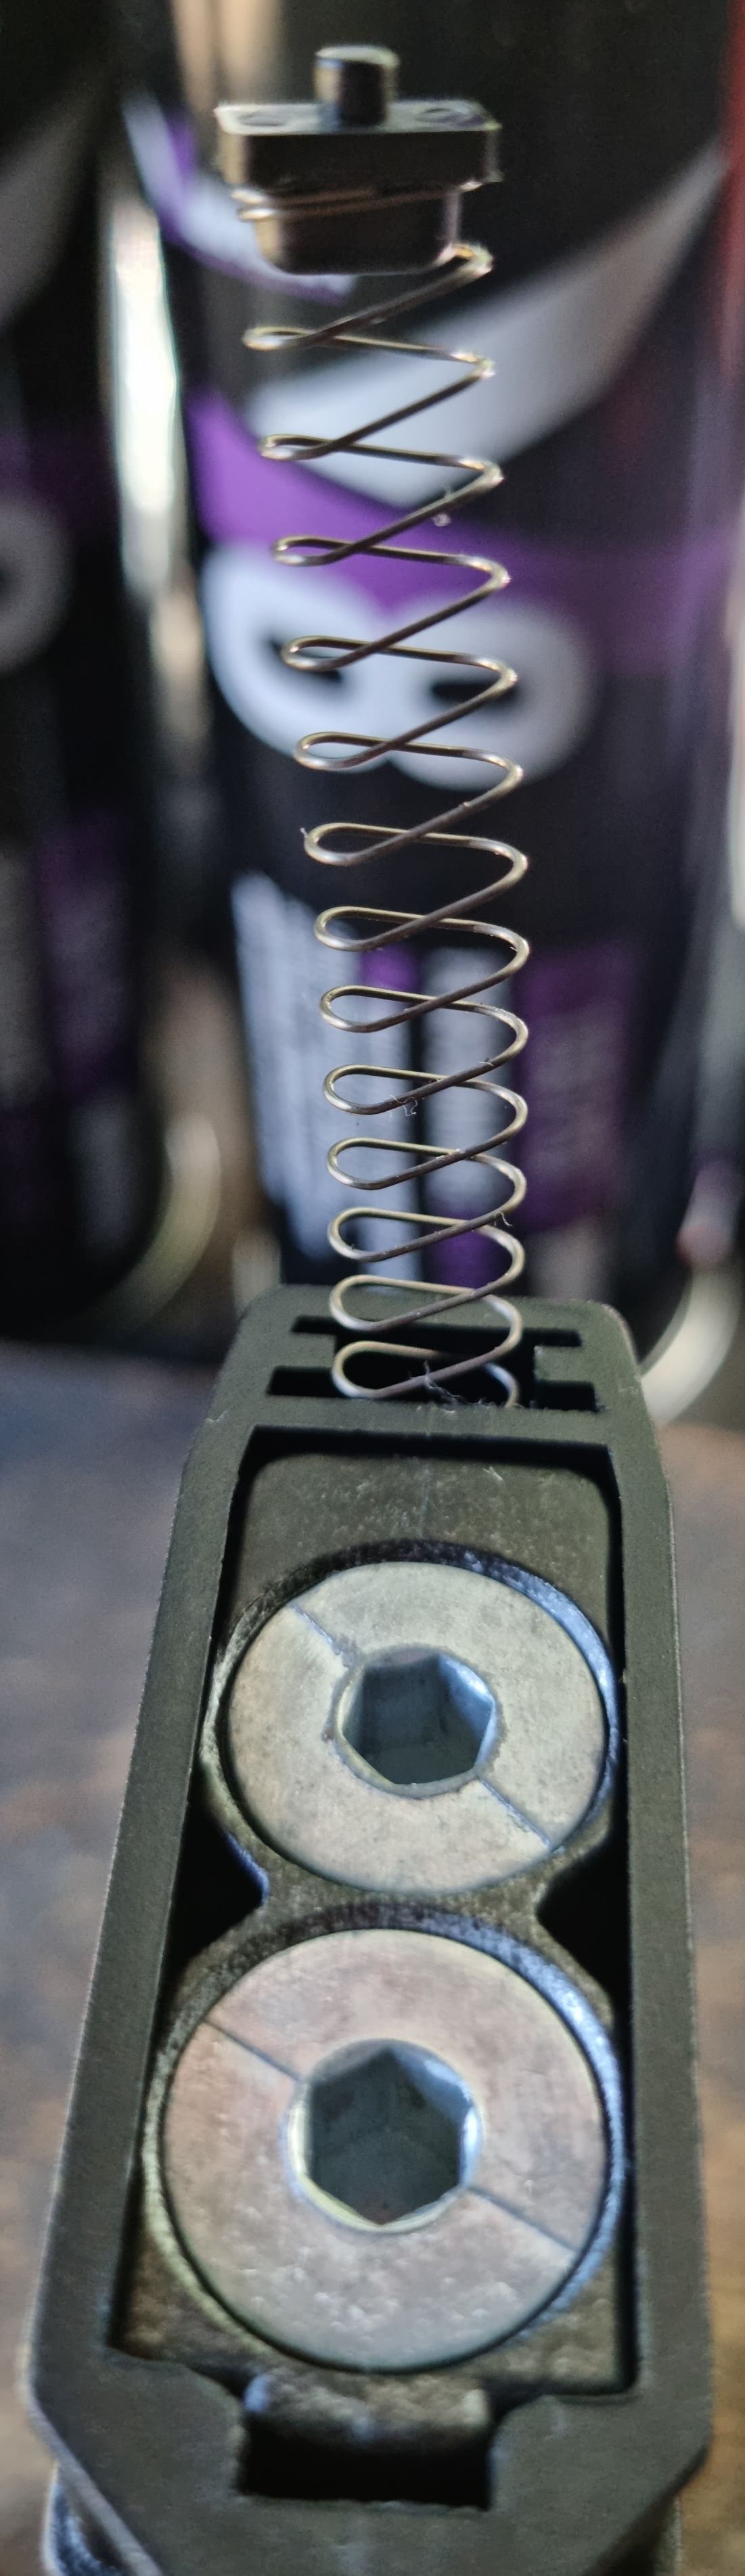
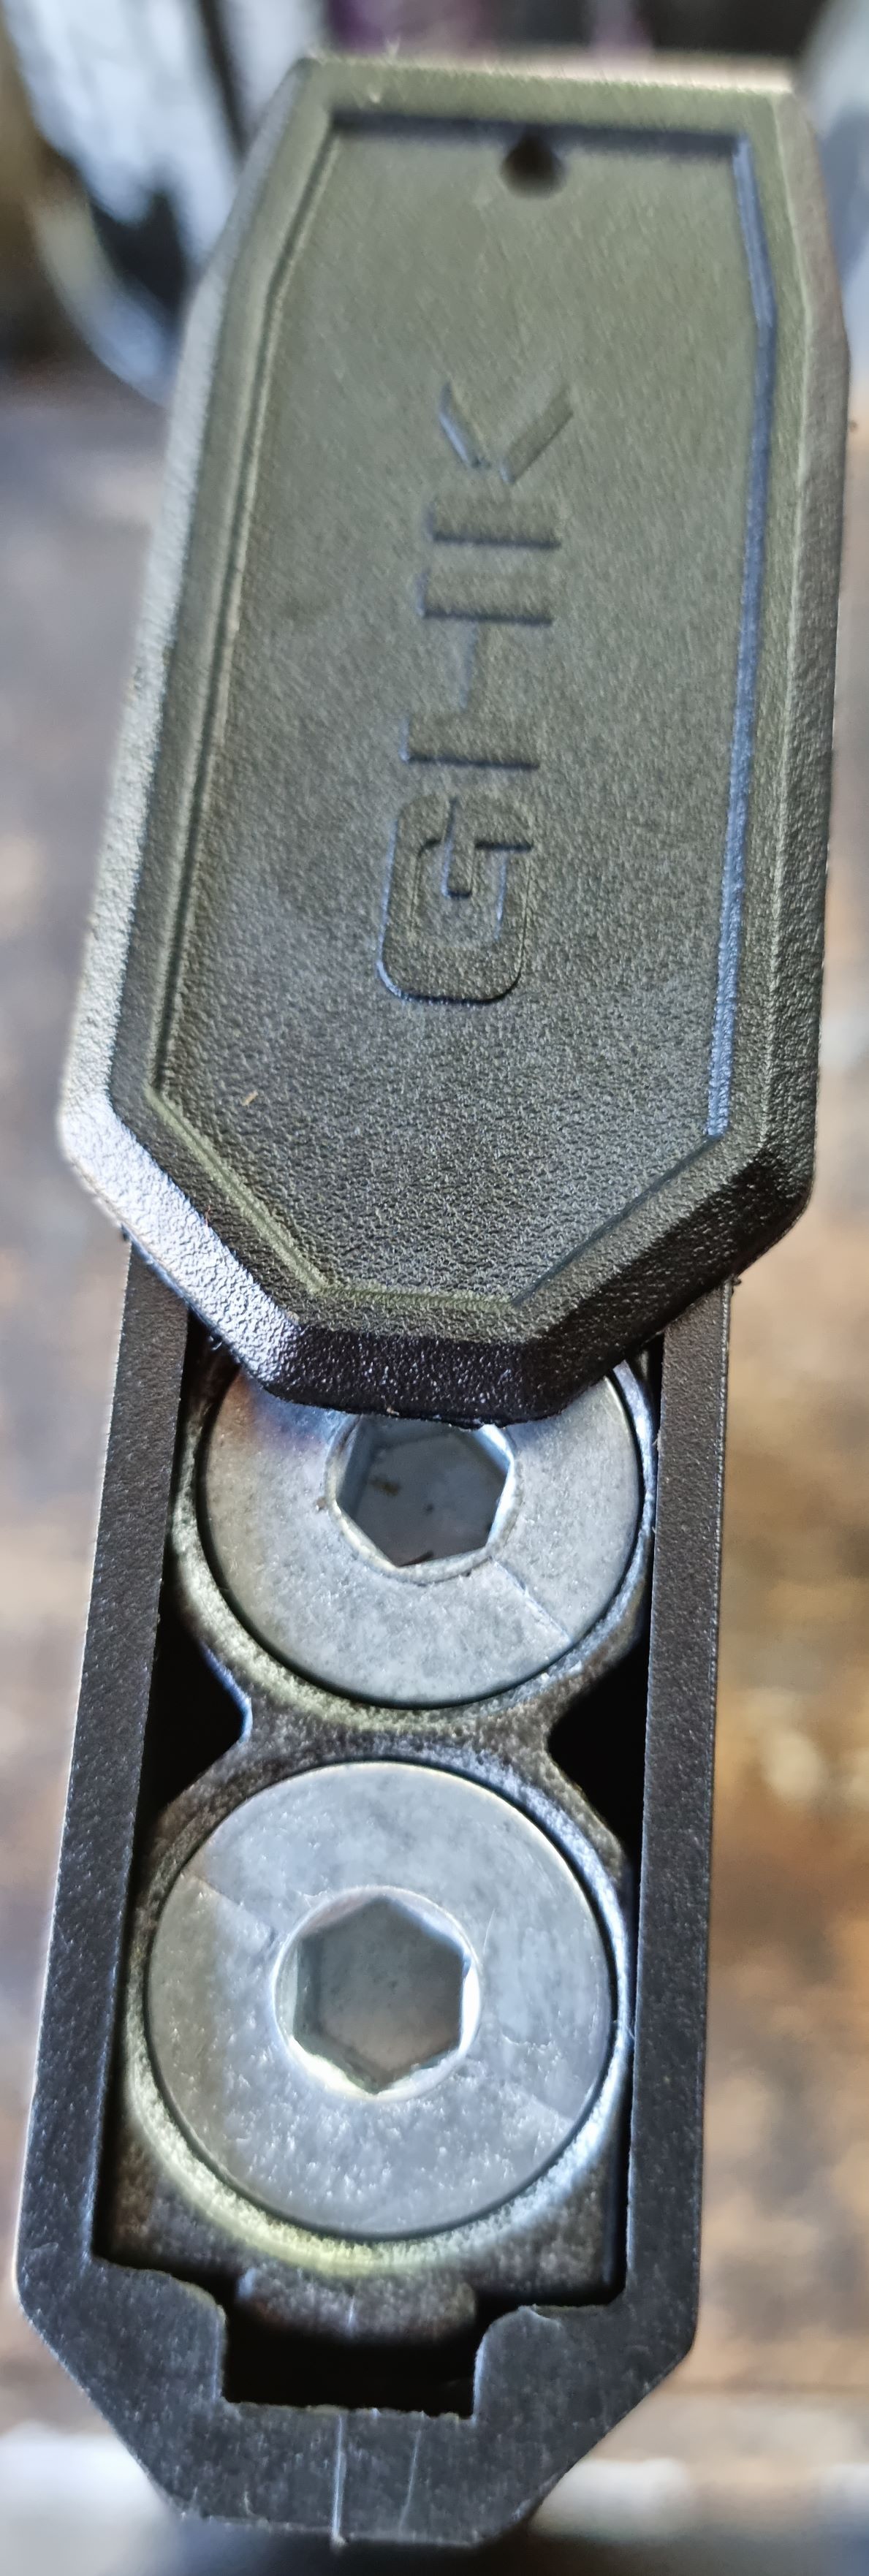
Step 2: For this step you need the Rubber Mallet, flip the magazine upside down and there is a small plastic nut sticking through the base plate. Use your thumb to push this back into the magazine and softly tap the pointy end of the base plate. When the base plate is almost off get your thumb in place to catch the small plastic nut as it will go flying off into the abyss if you don't.
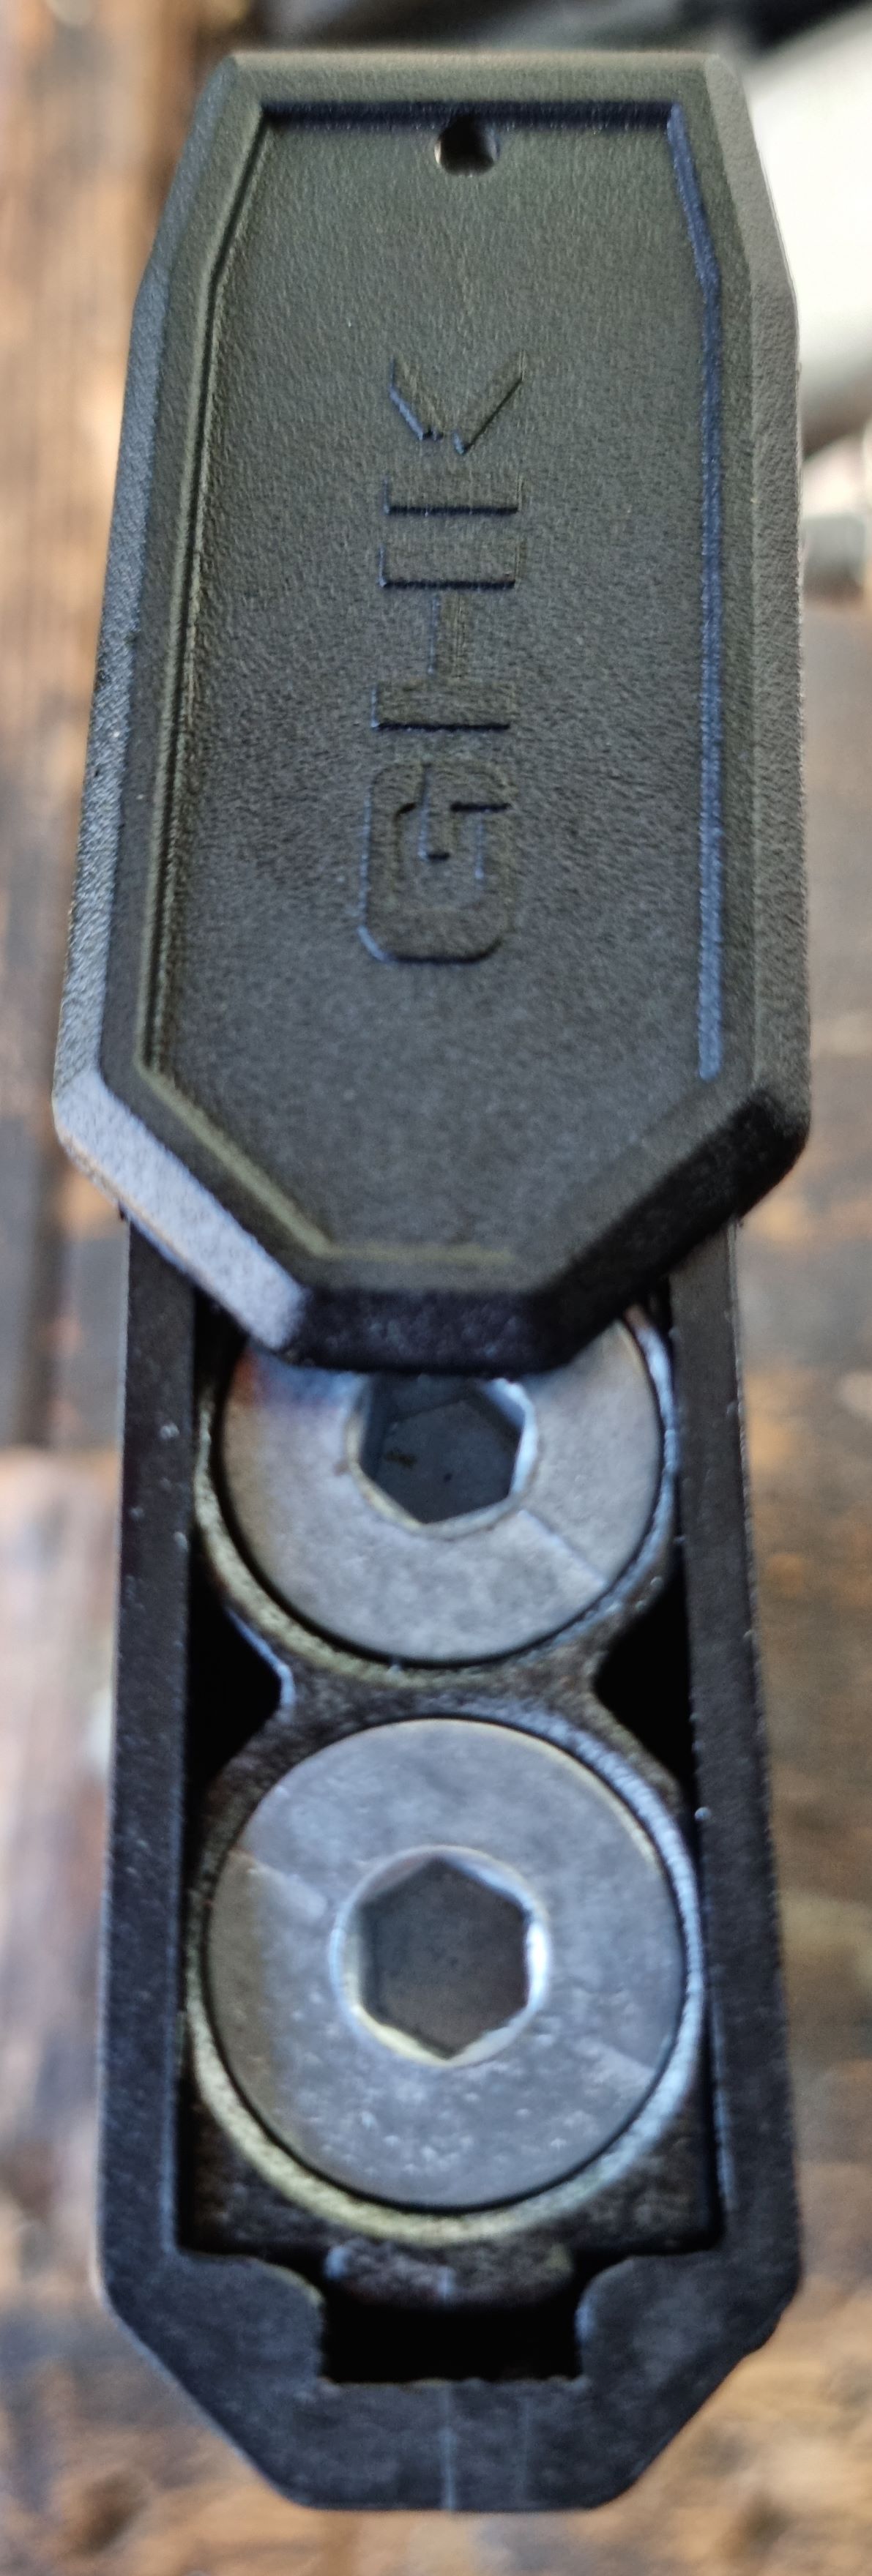
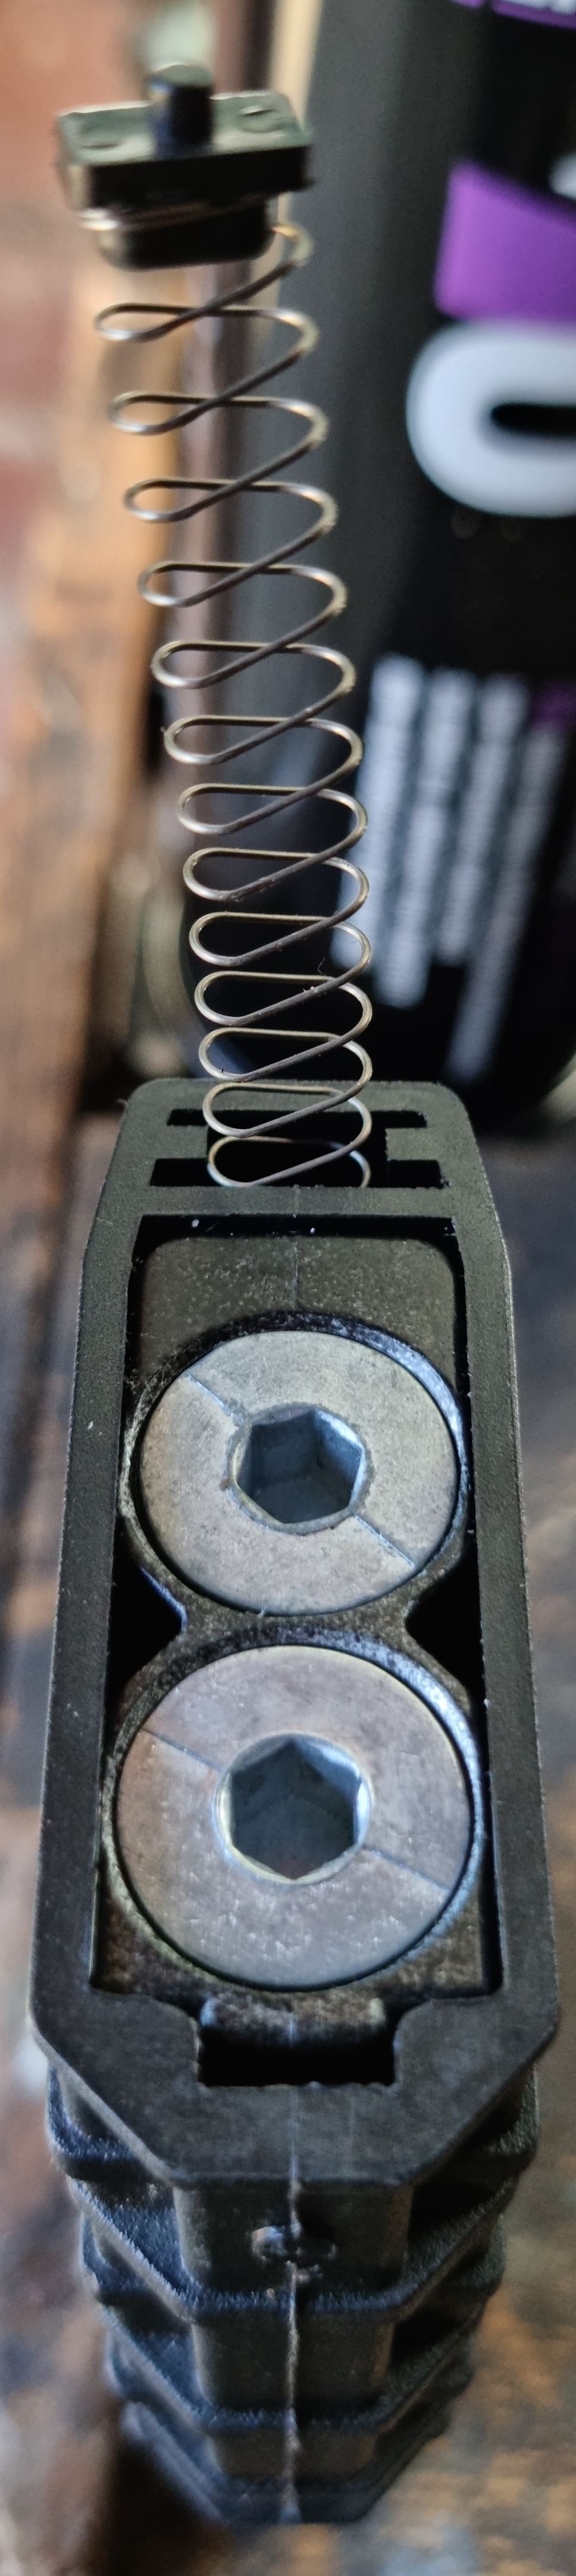
Step 3: Remove the plastic nut, spring and follower from the magazine, they should all come out as one part but if the follower gets stuck that's fine.
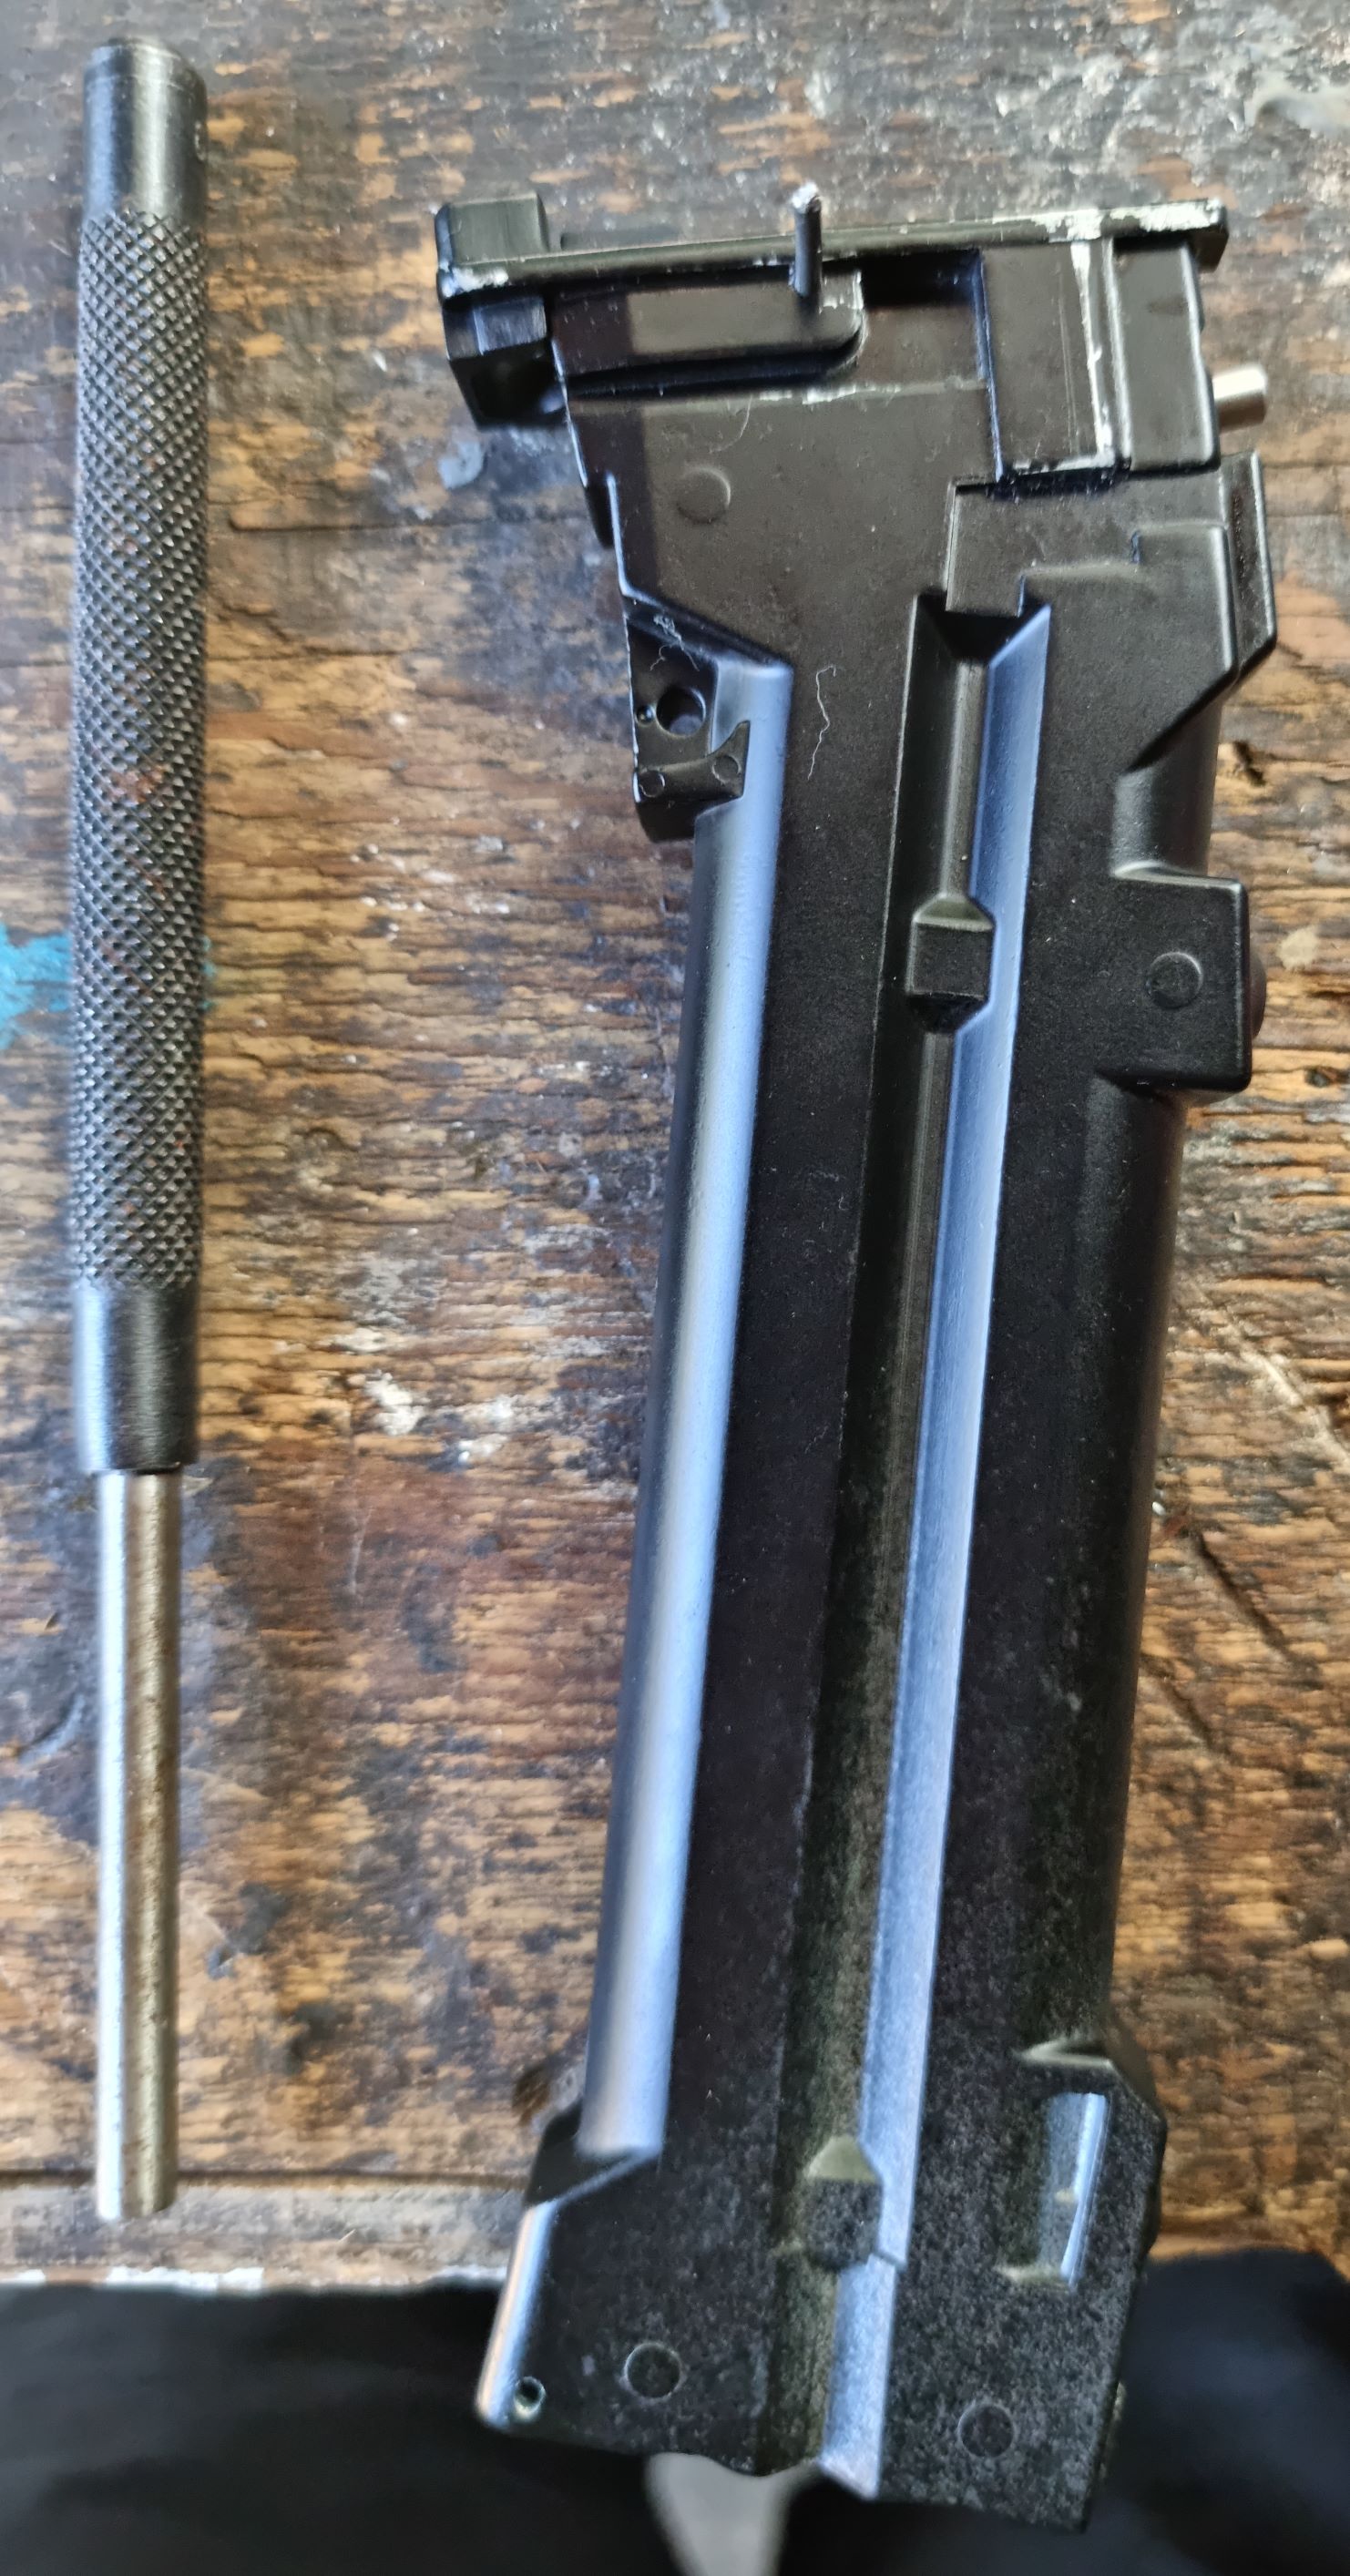
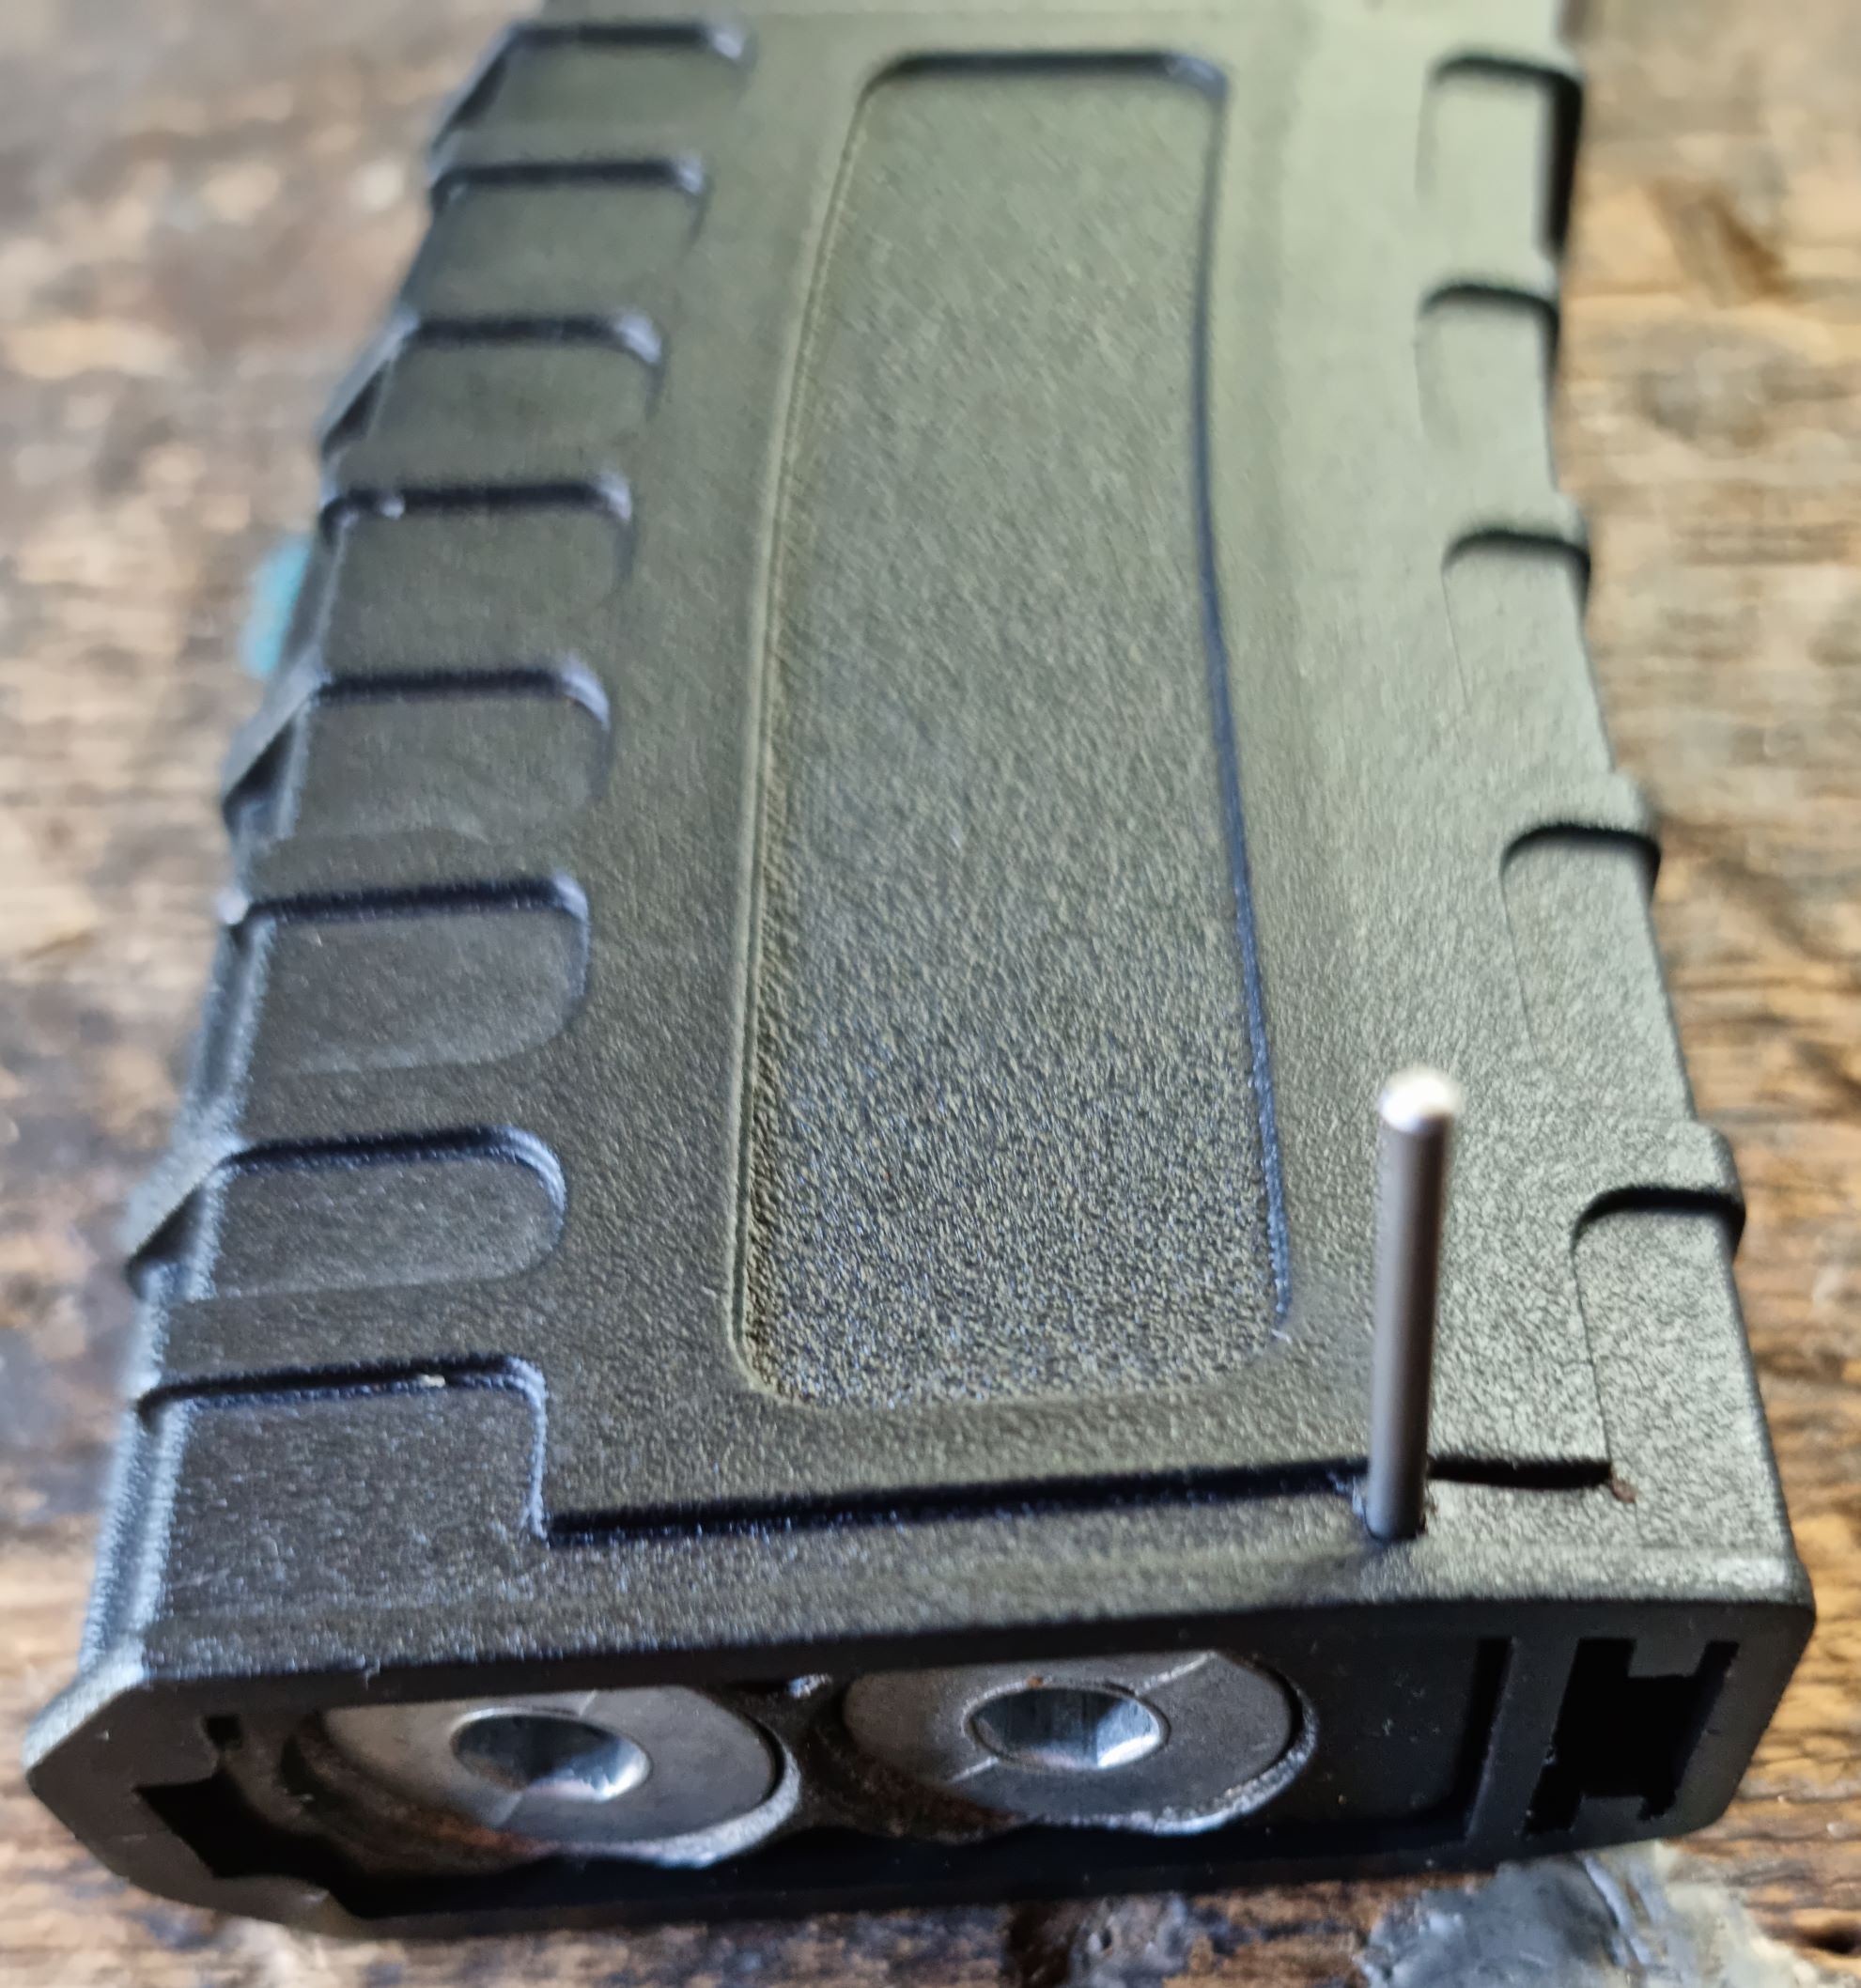
Step 4: Next we need to remove the plastic shell, at the bottom of the magazine there is a pin that needs to be knocked out.
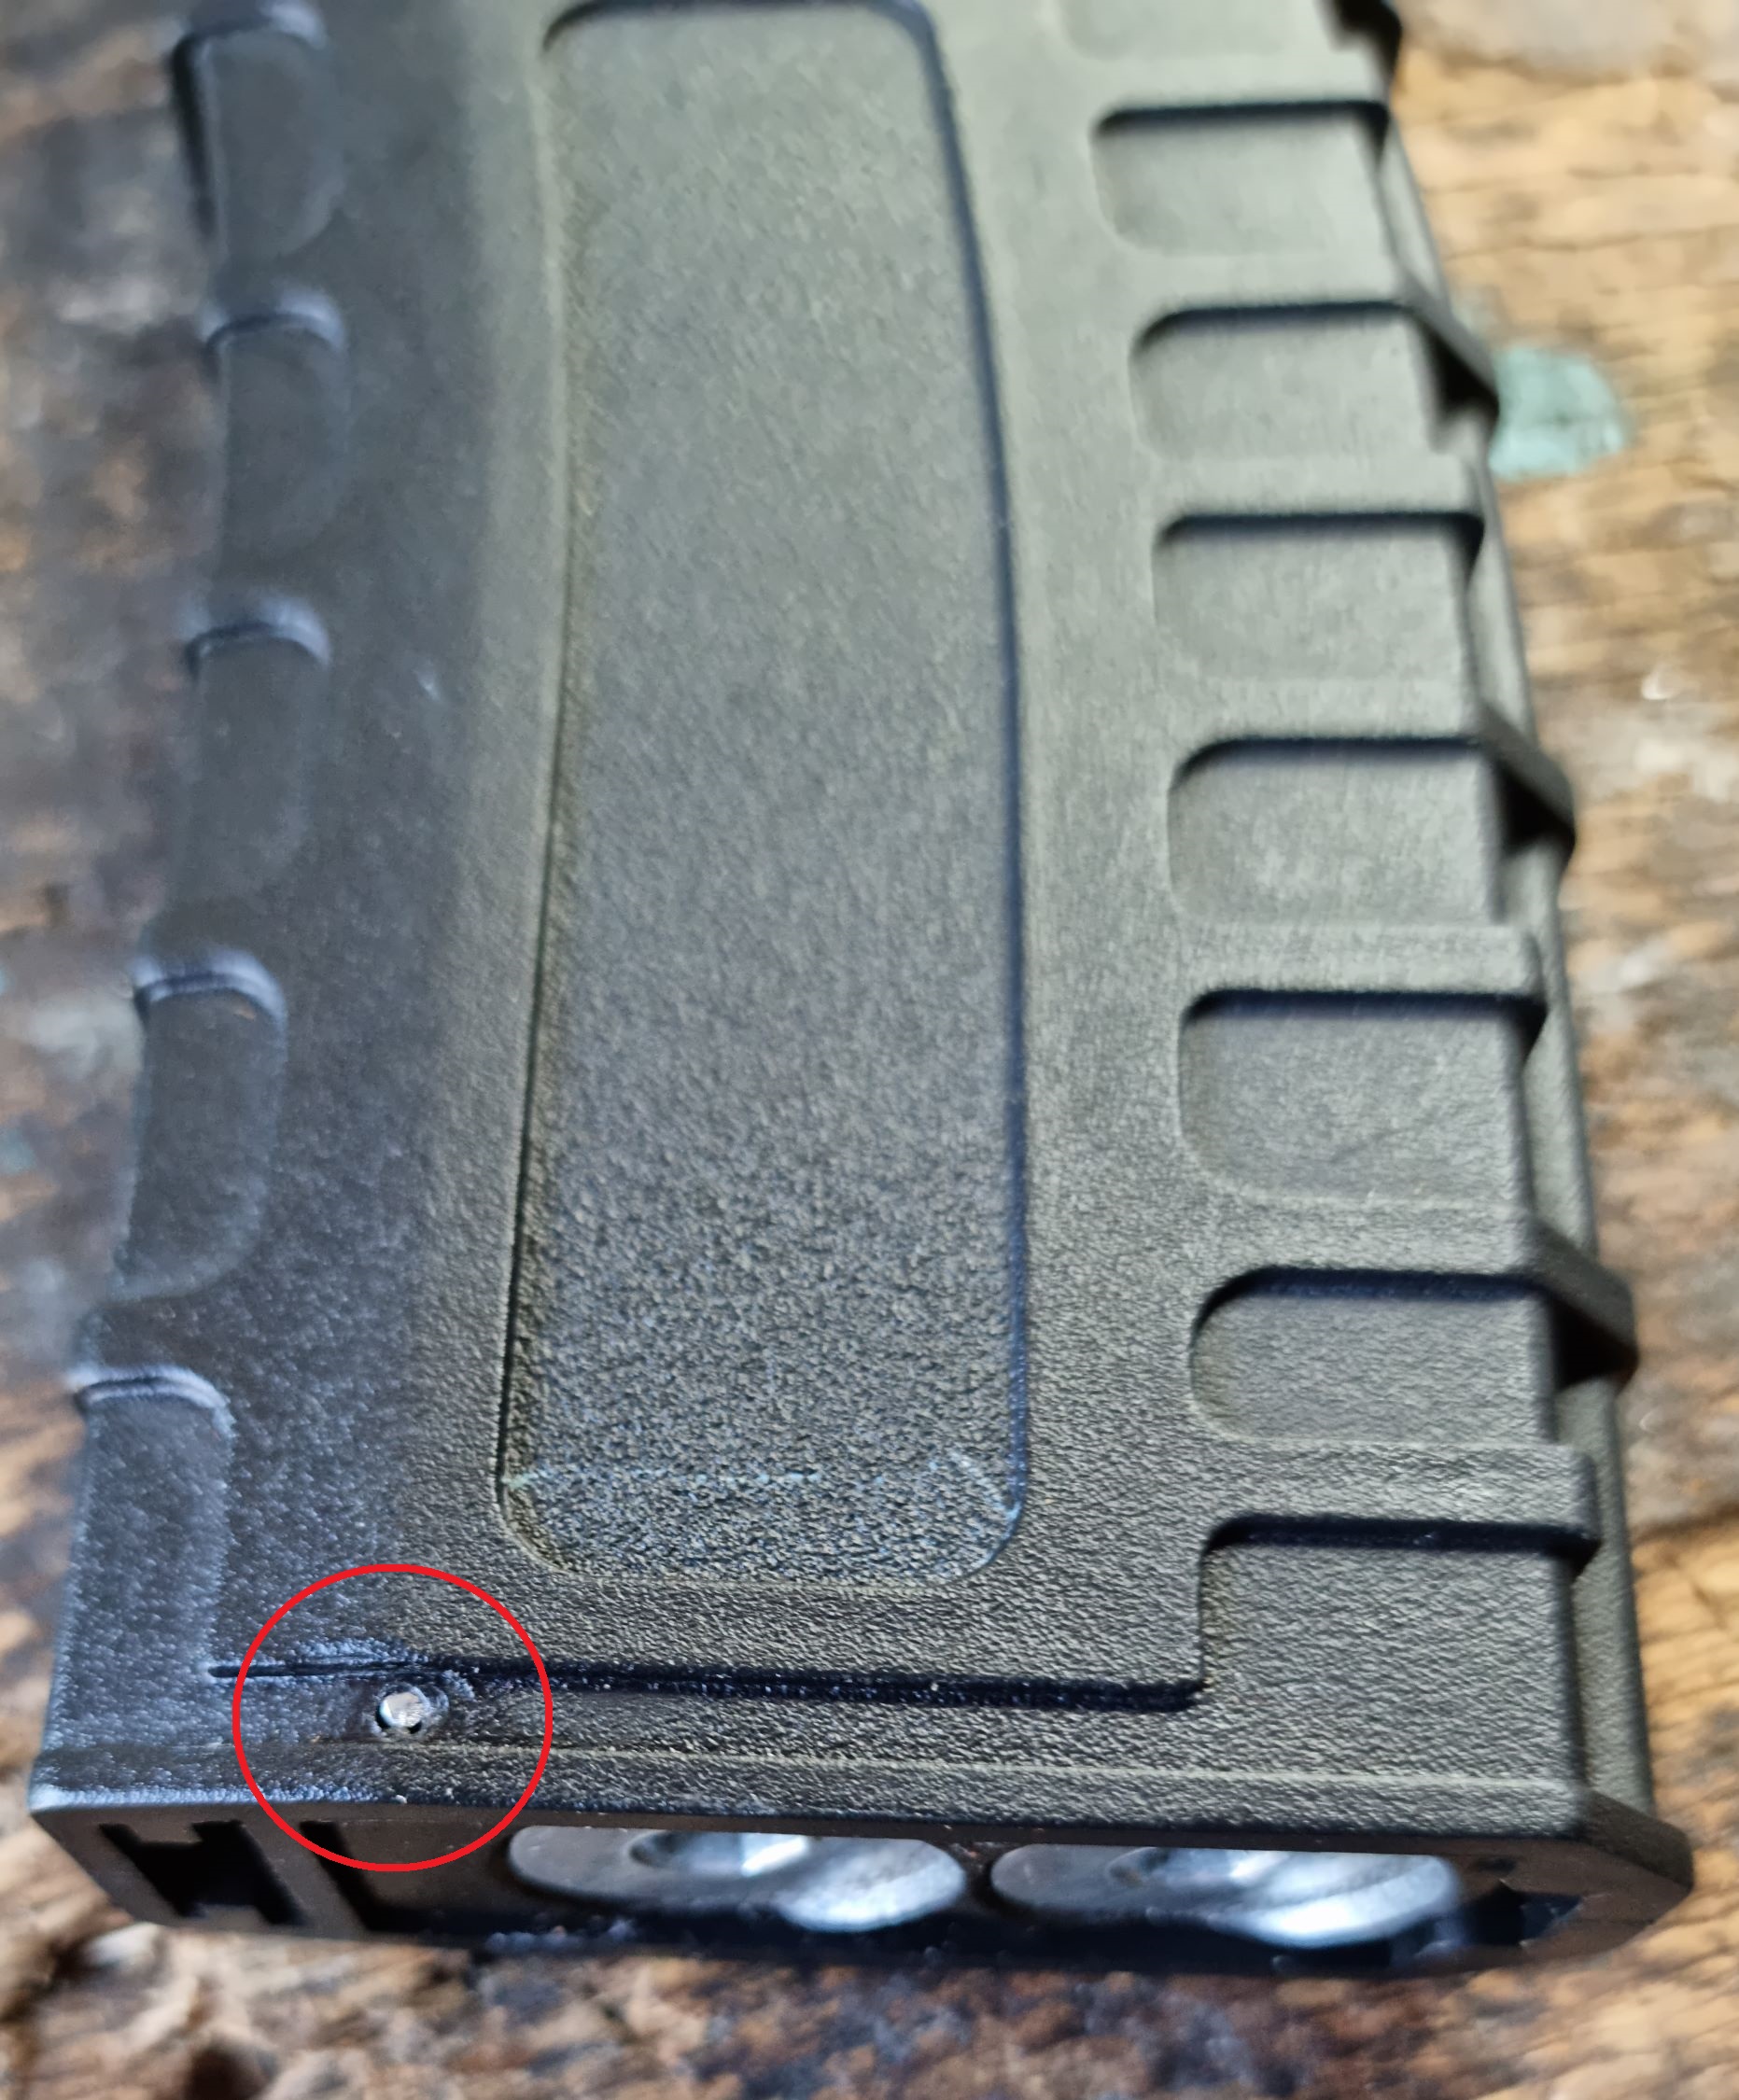
I recommend using your small pin punch to hit it out a little bit just enough so you can use your pliers to pull the pin out. Once the pin is out then push the internal part of the magazine upwards and out of the plastic shell.
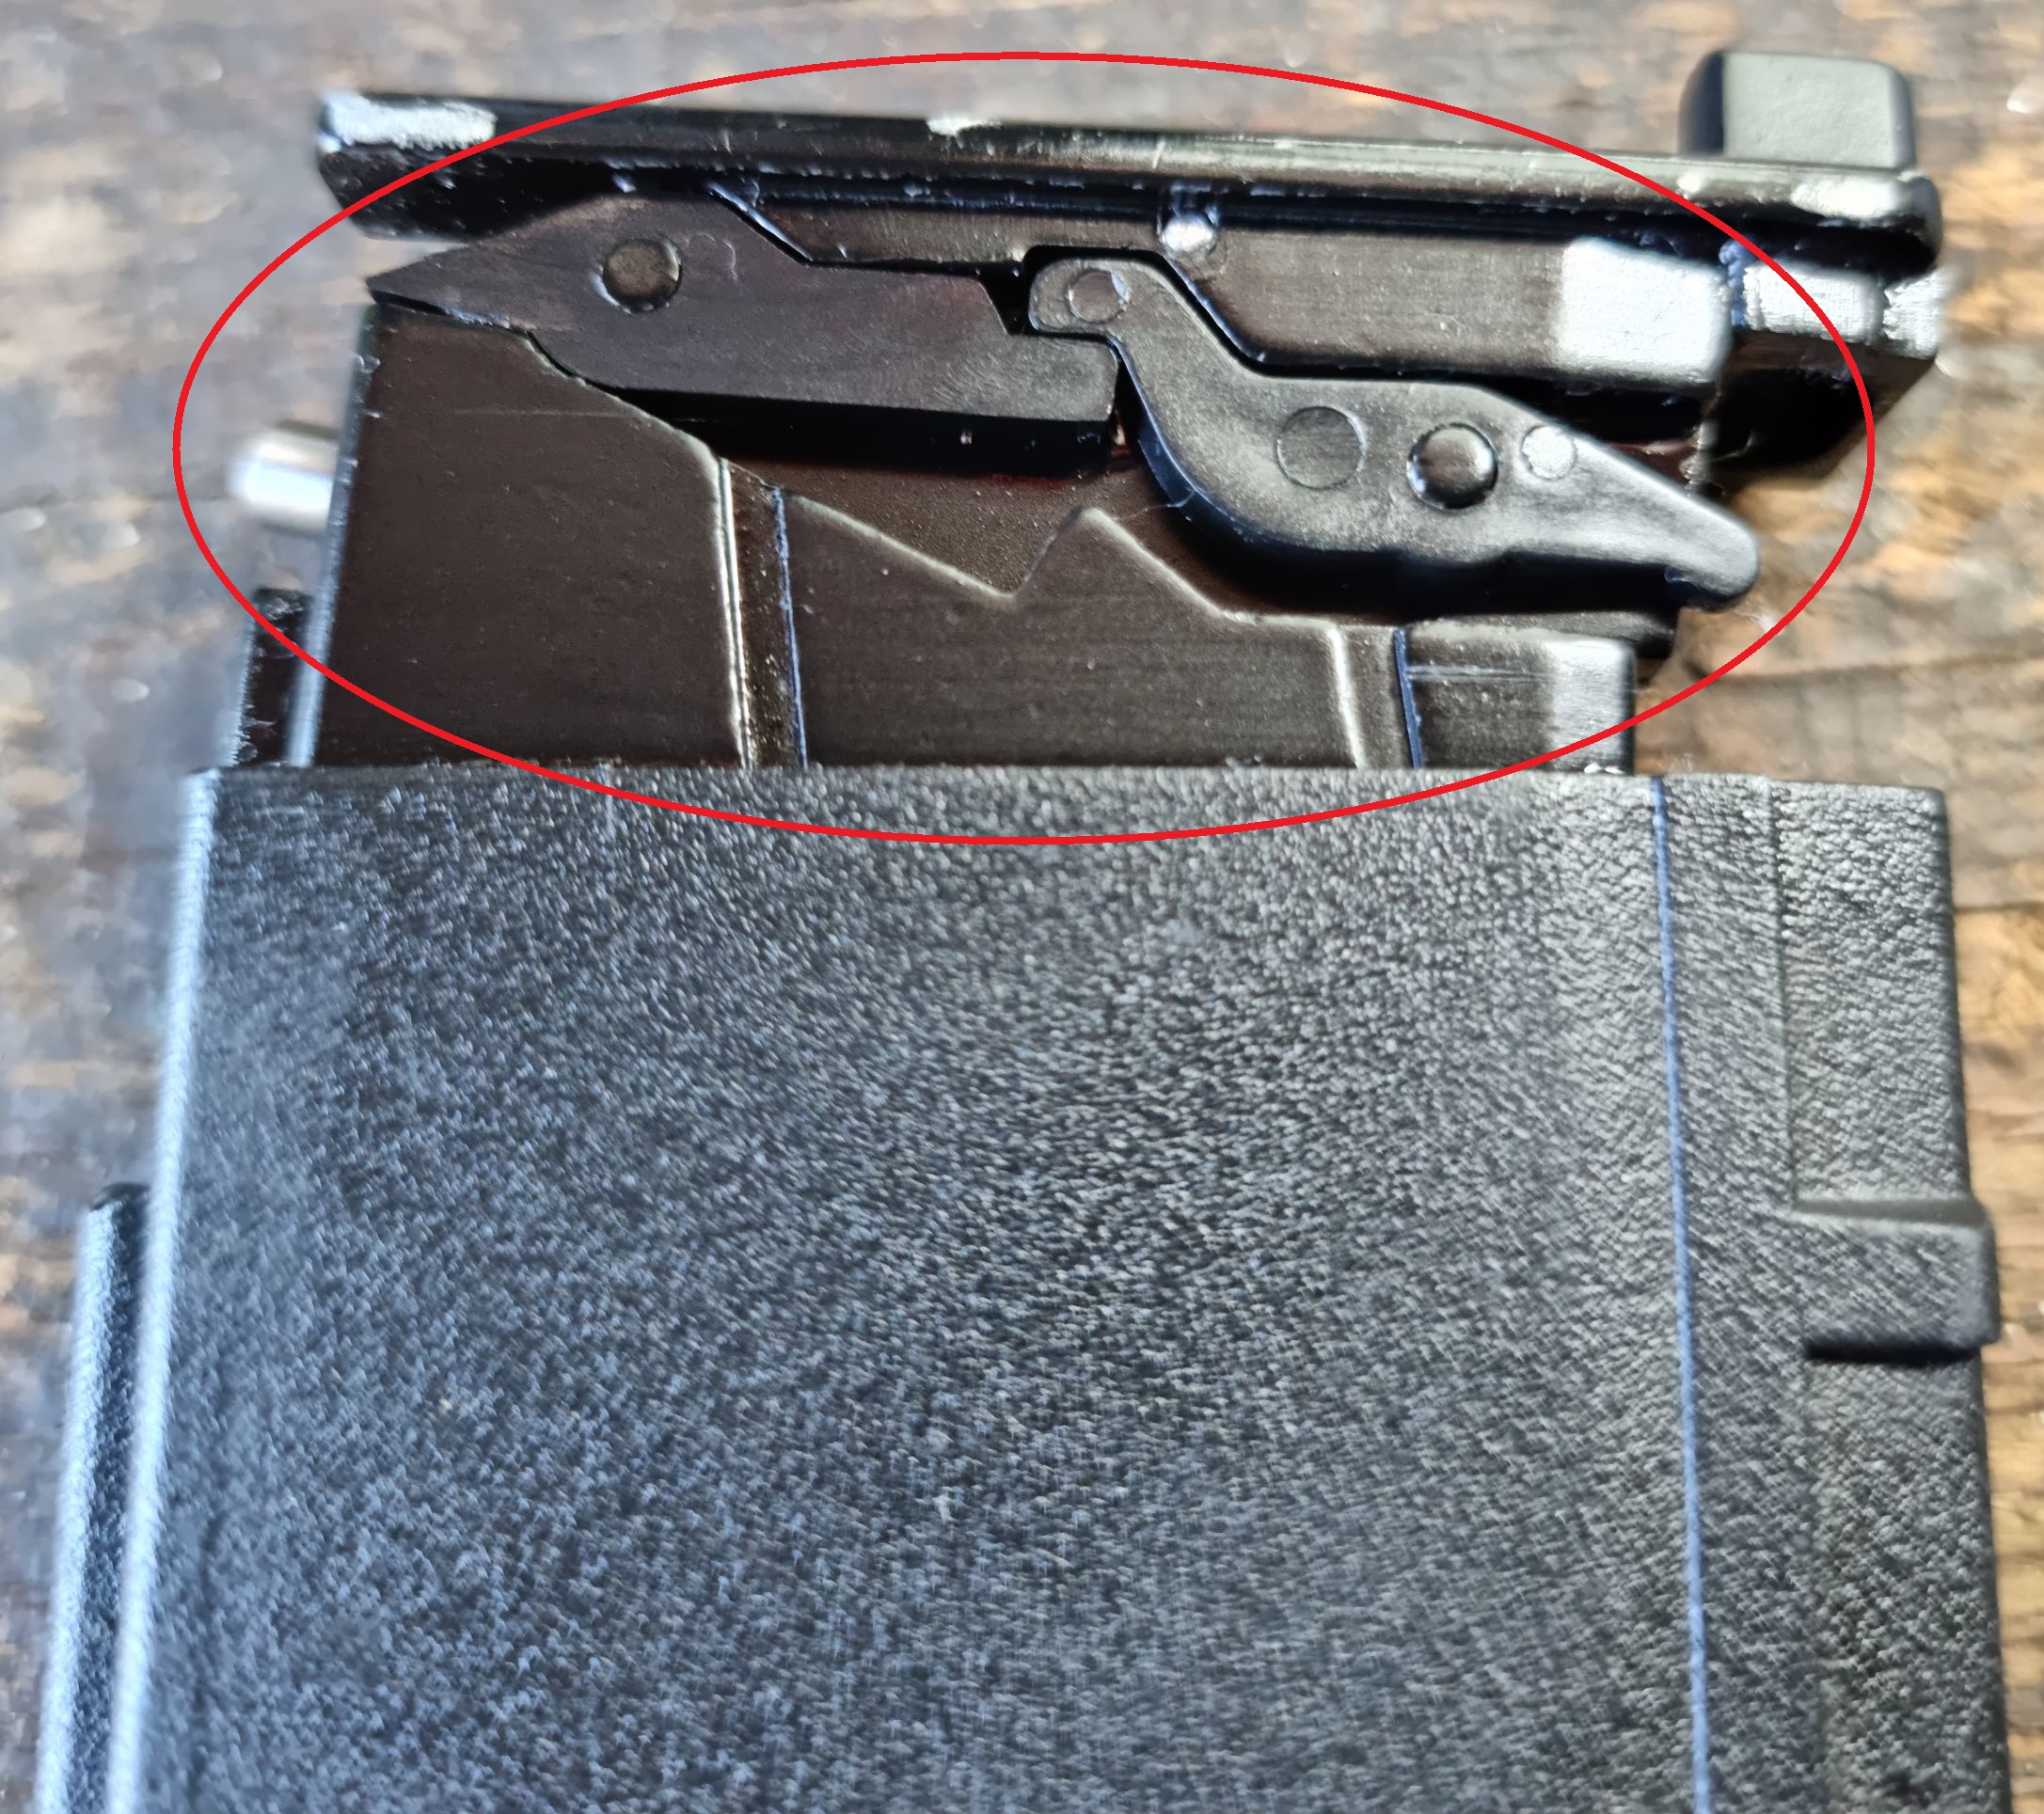
Step 5: Remove the two levers.
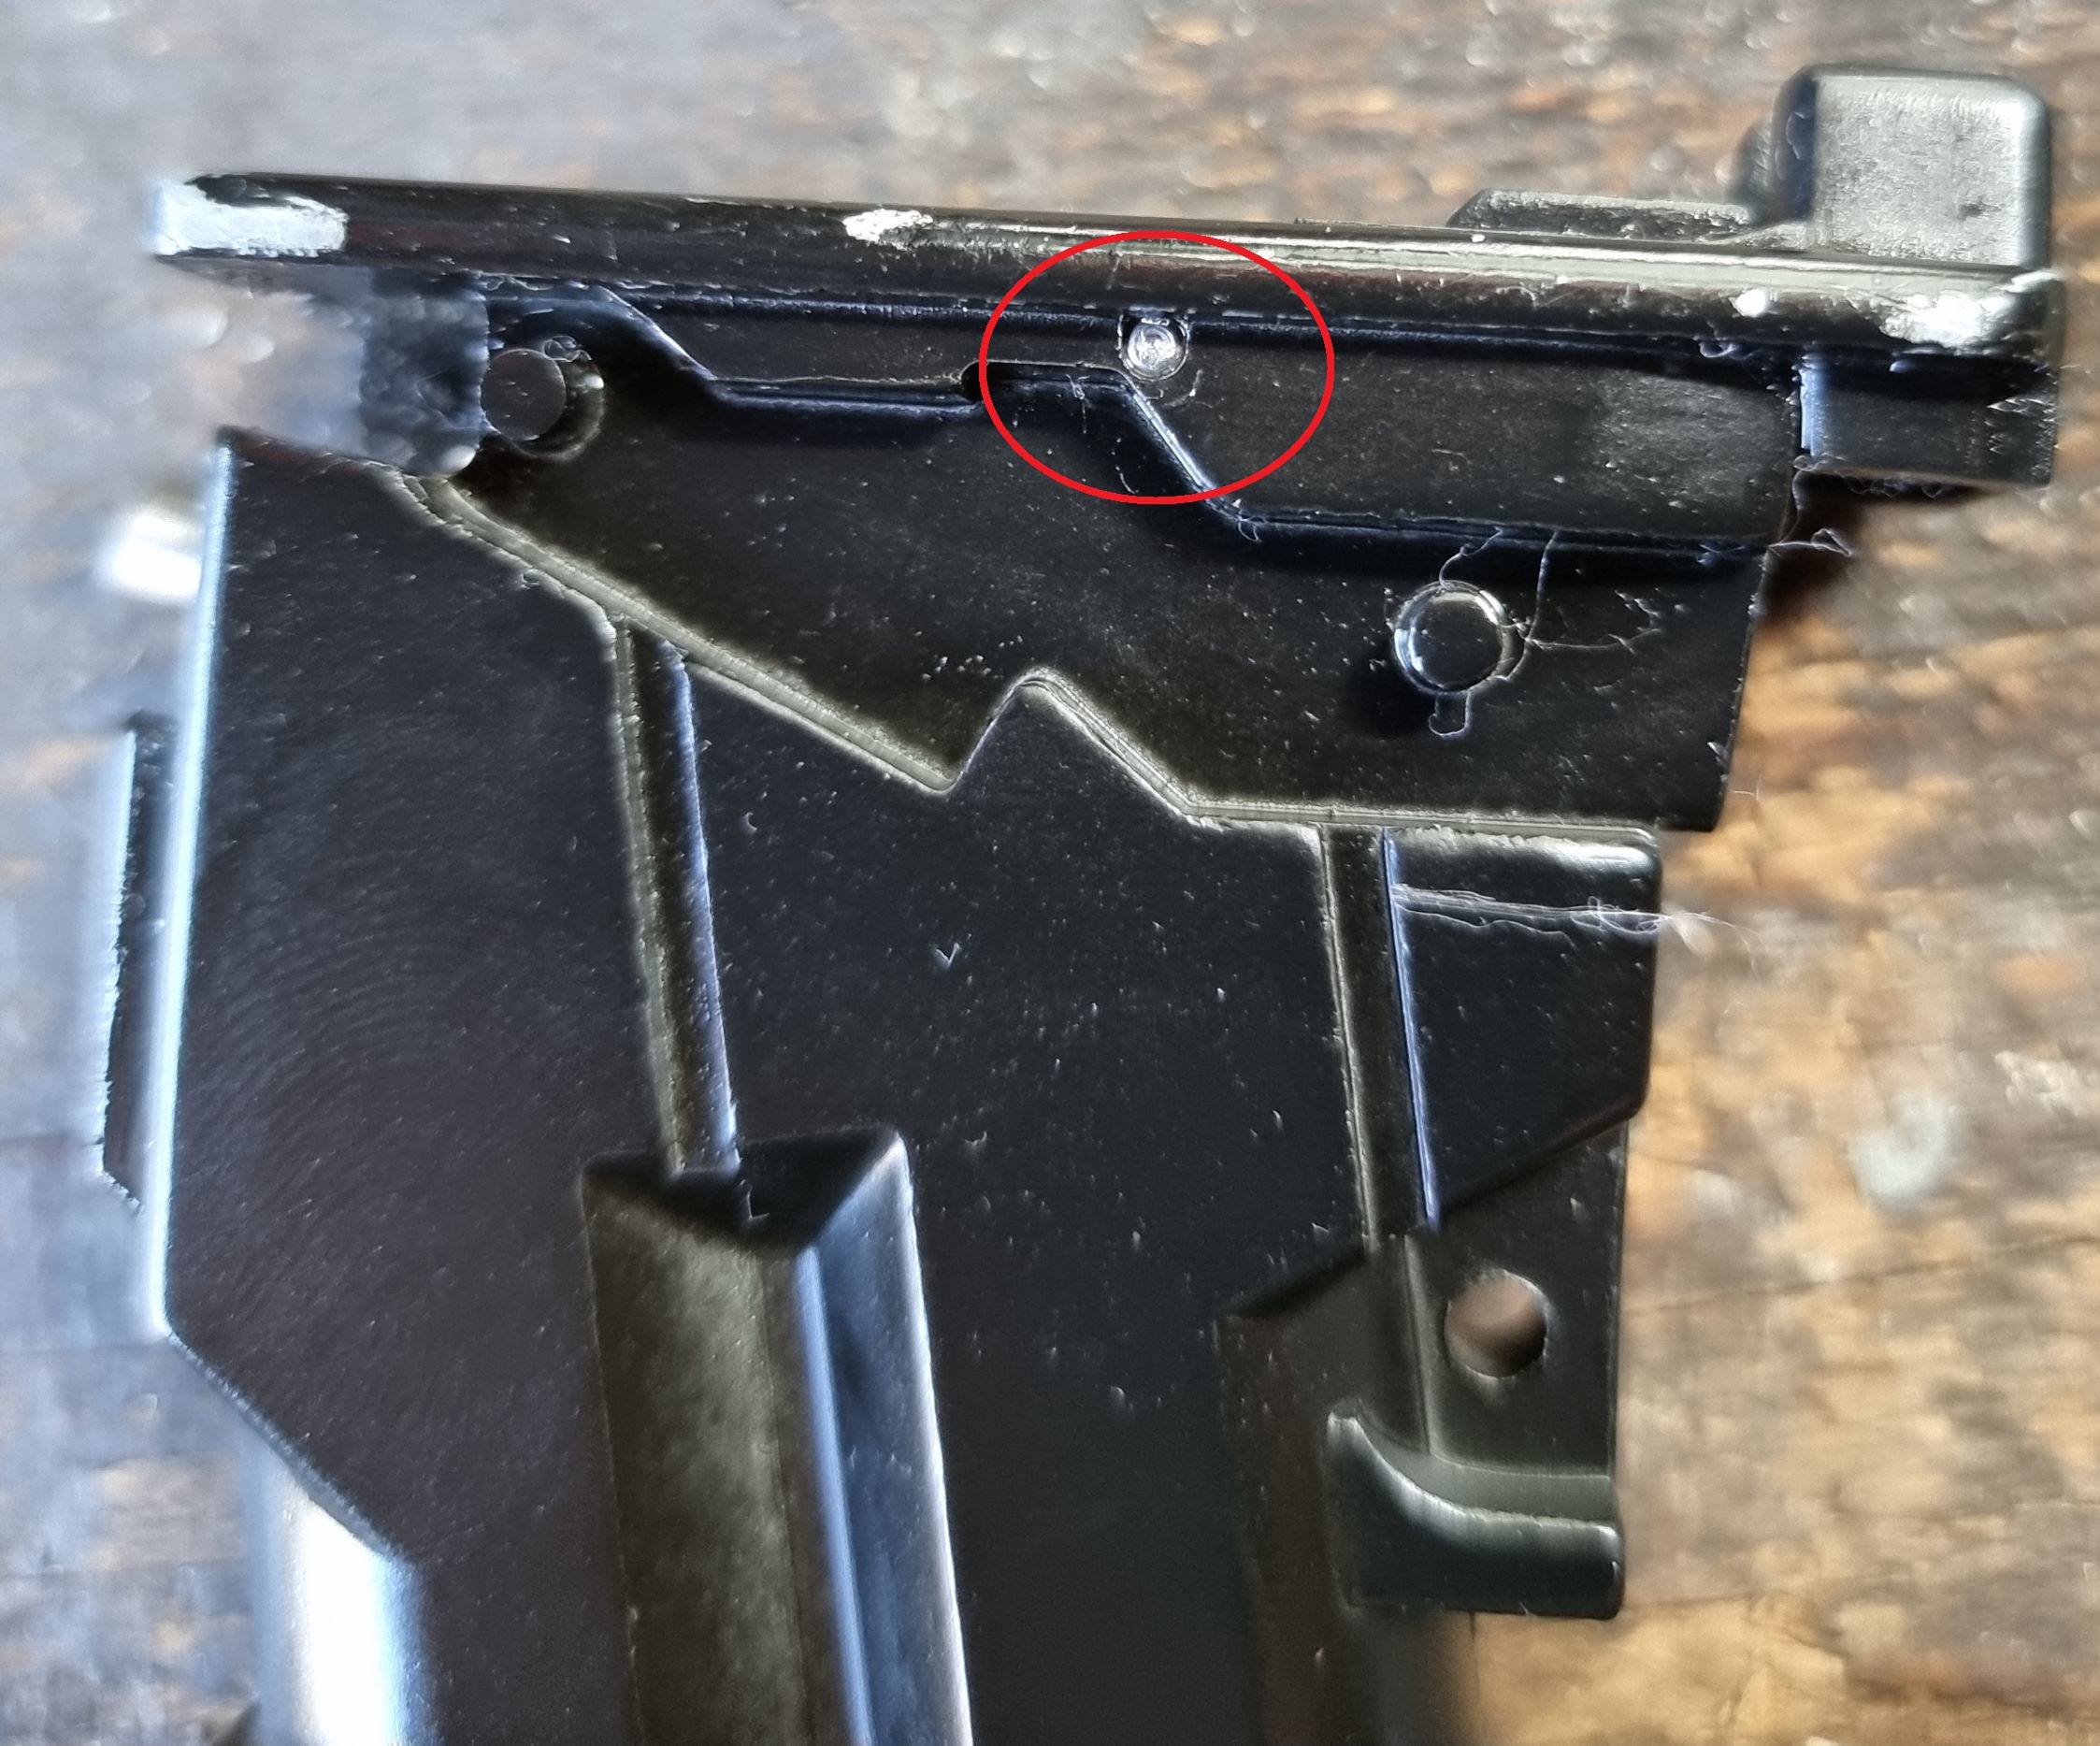
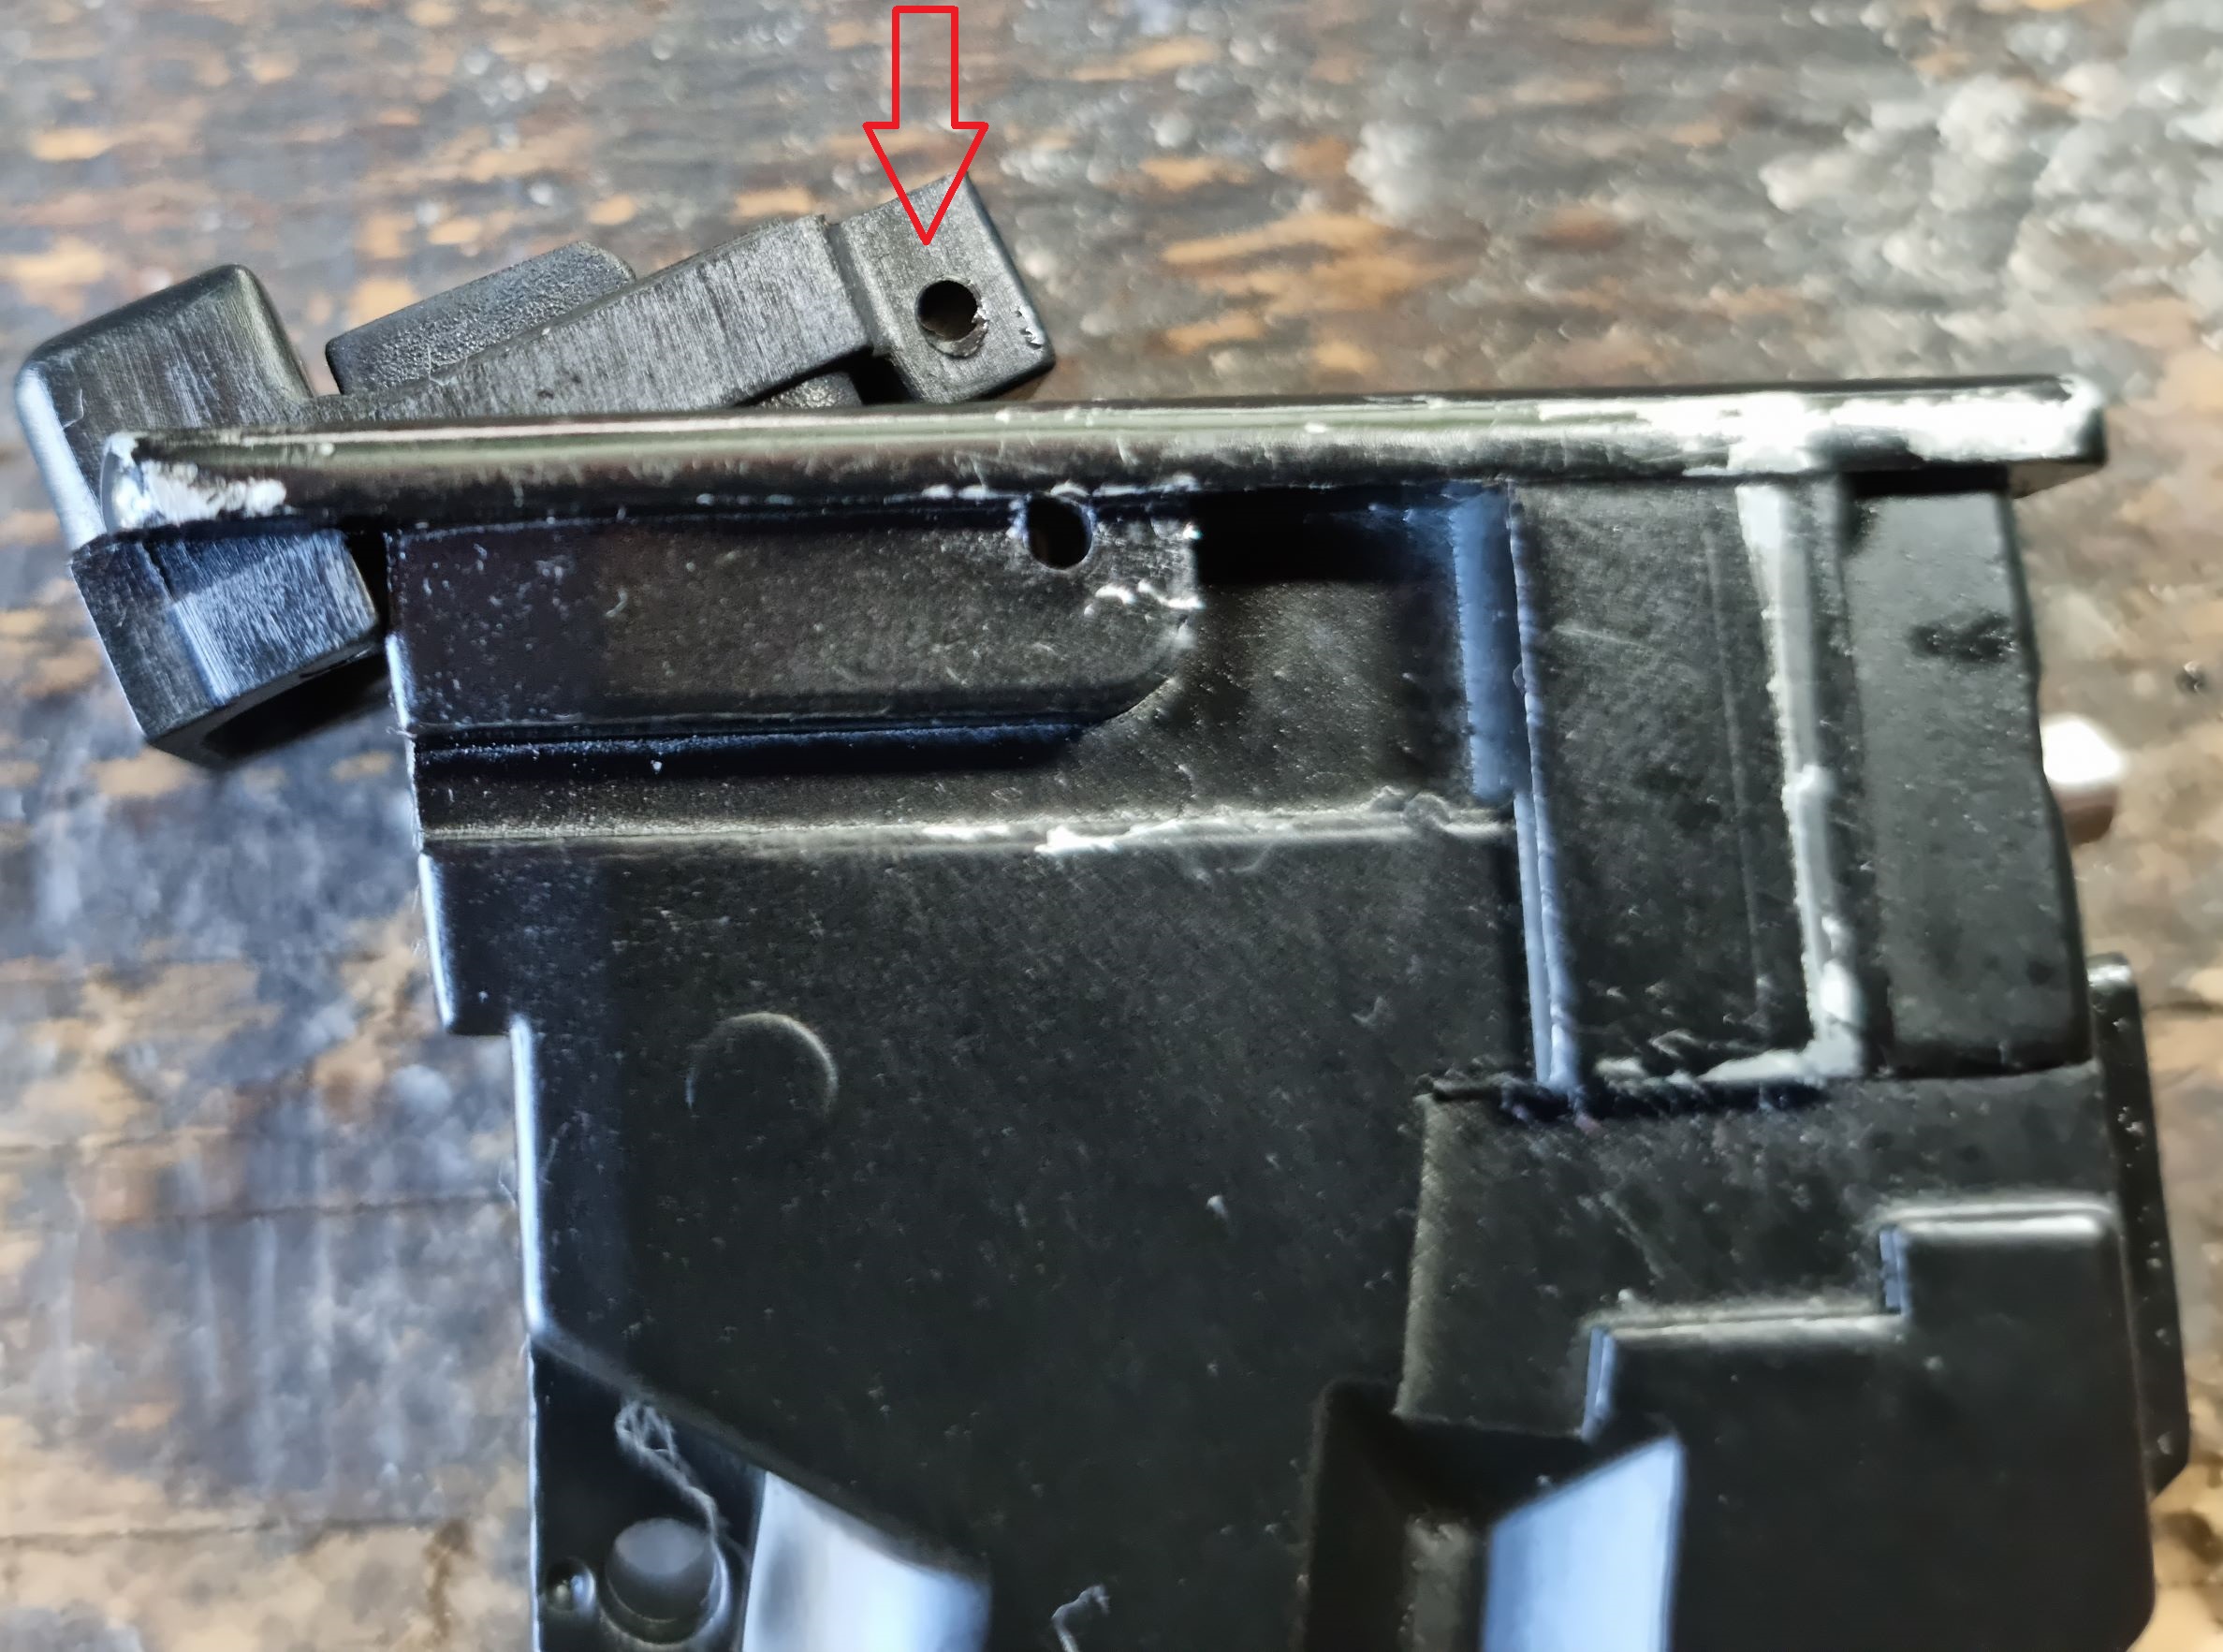
Step 6: Remove the pin that holds the feed lips in place, again I recommend knocking this a little out just enough so you can use your pliers and pull the pin the rest of the way.
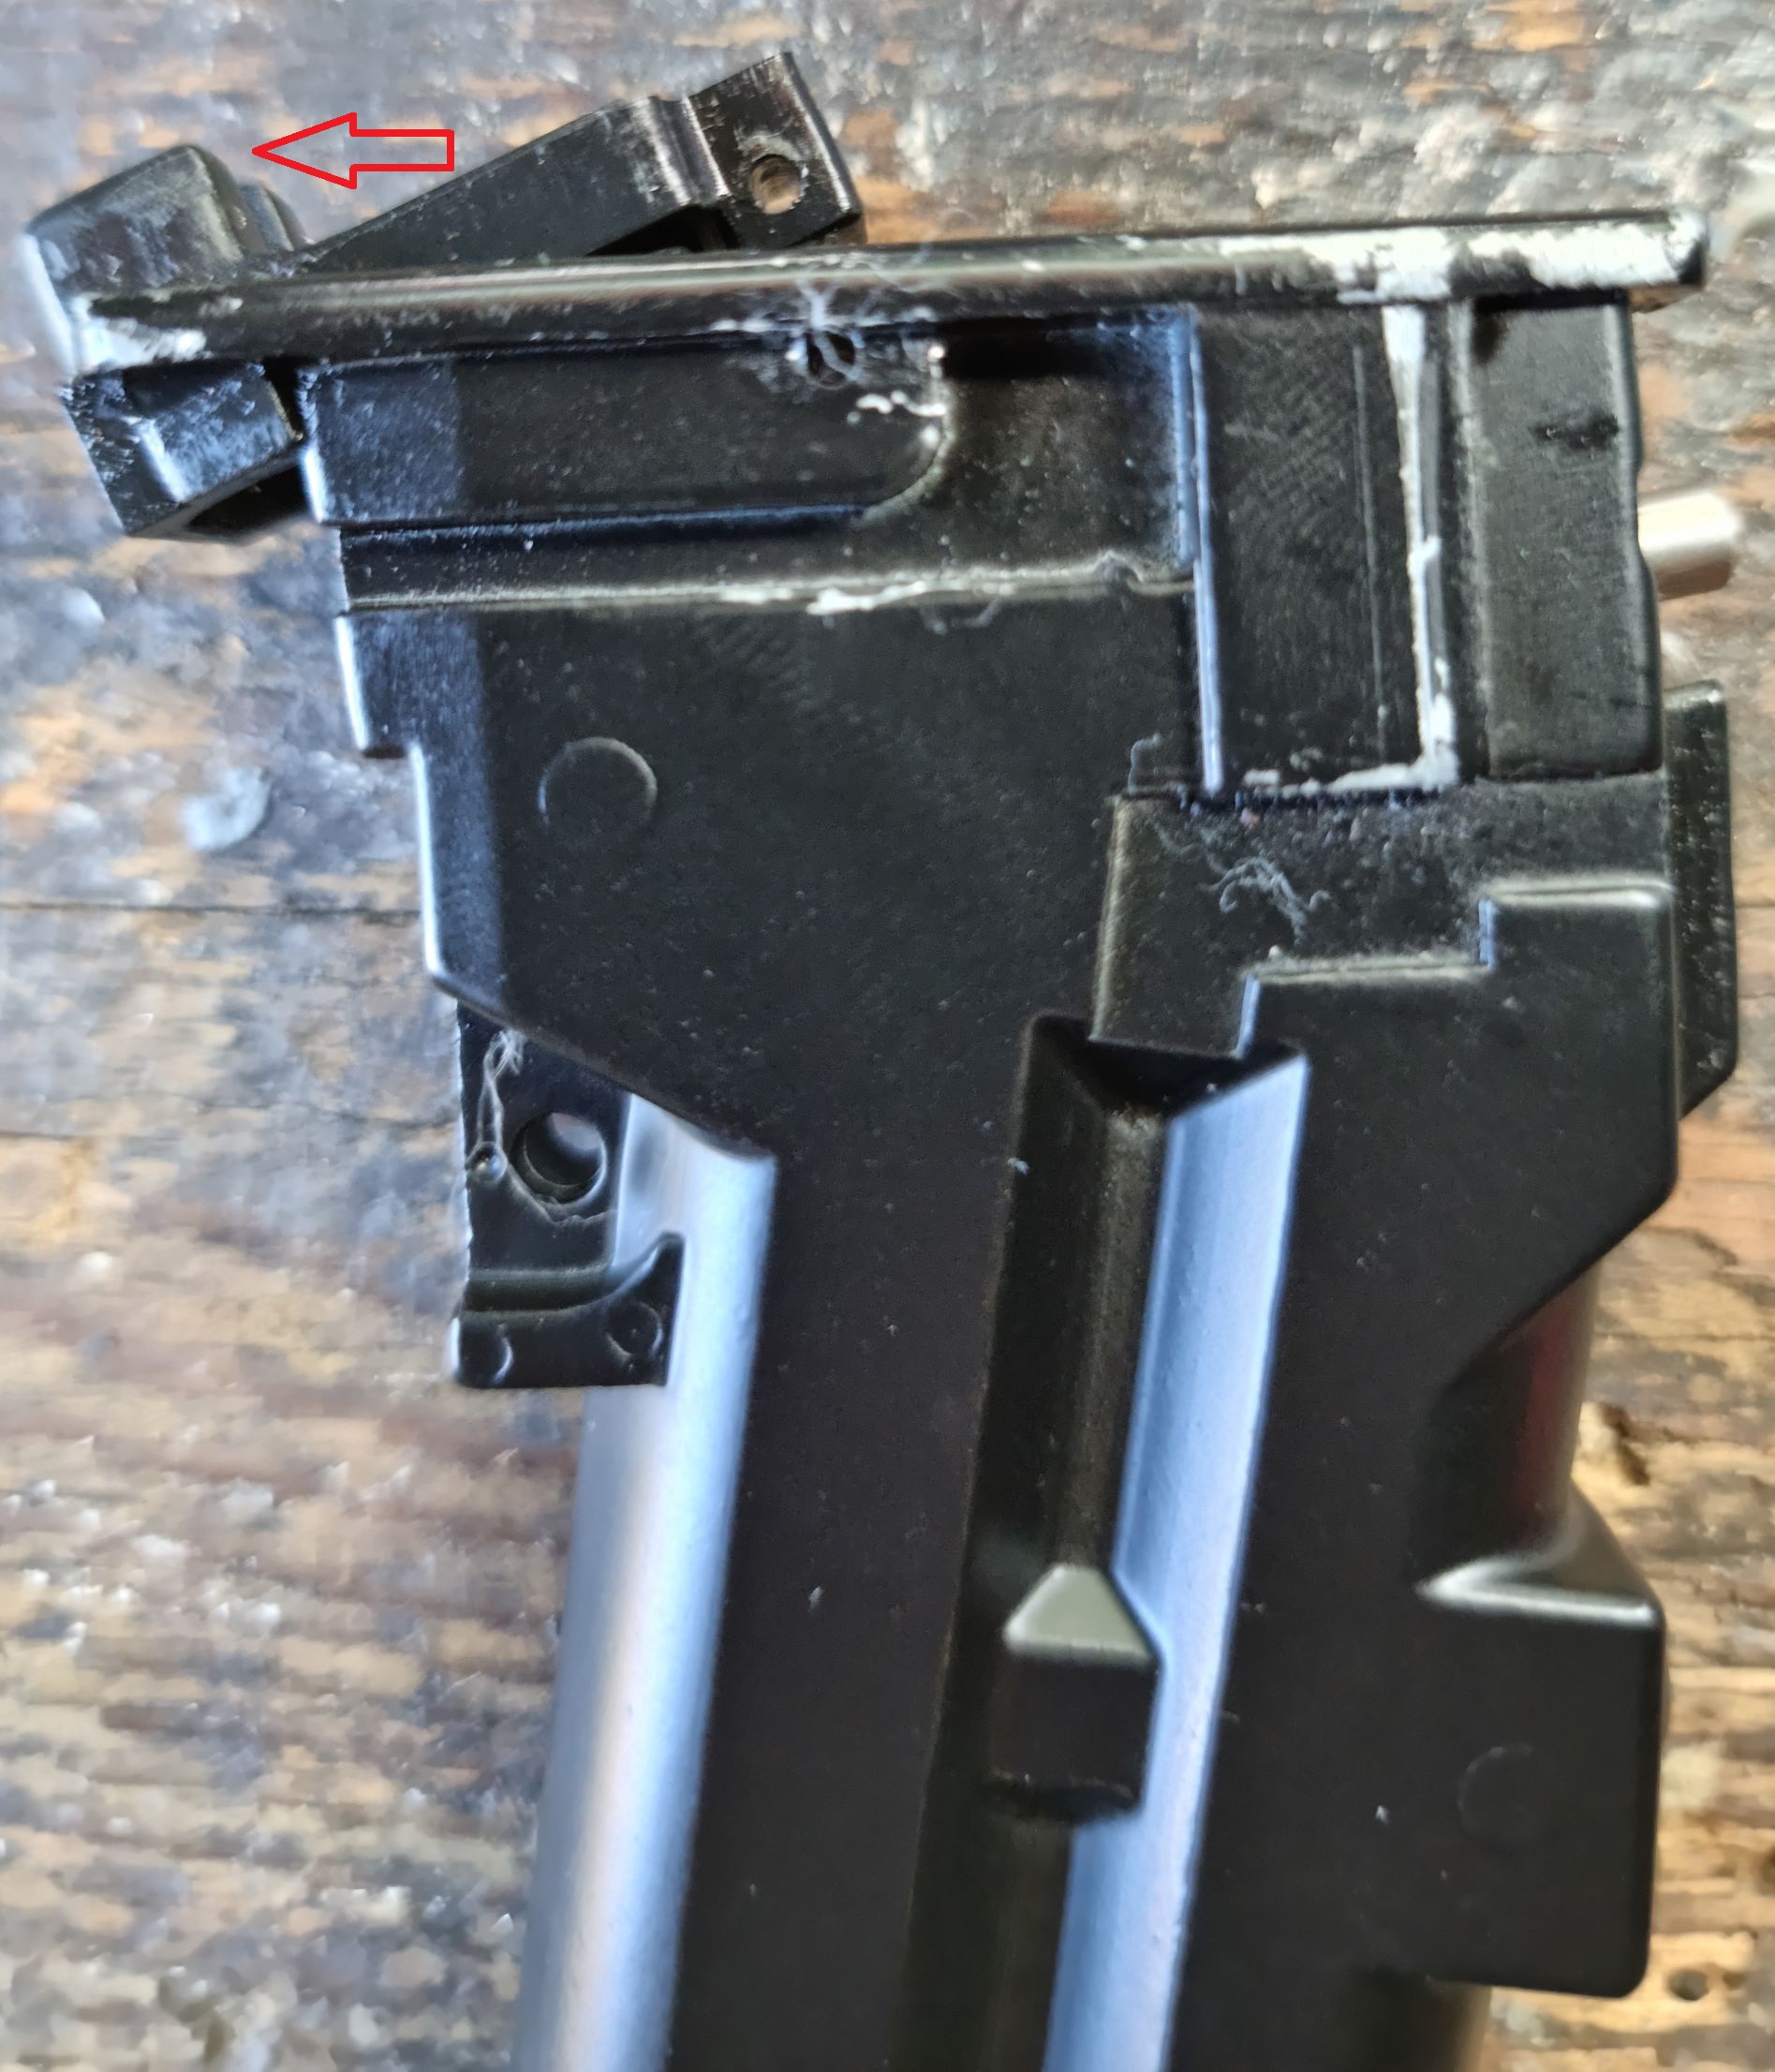
Step 7: Remove the feed lips, push outwards and the whole unit should pop up from the end where the pin was. If it won't budge then give the feed lips a tap with your rubber mallet and this should be enough to get them out. When you remove the feed lips there will be a small rubber gas guide, this can be discarded also.
Step 8: Get the replacement feed lips and make sure that the rubber gas guide is correctly positioned through the hole.
Step 9: Push the feed lips in at a 45° angle and then push down at the back of the feed lip so that the hole at the back of the feed lips are aligned with the hole on the magazine.
Step 10: Push the pin back through the magazine and the feed lip, out of the two pins make sure you pick up the smaller of the two. Use your large pin punch and rubber mallet to get the pin correctly pushed through the magazine. Don't leave any of the pin sticking out as this will prevent the plastic shell from being installed.
Step 11: Install the two levers and push the internal part of the magazine back into the plastic shell.

Step 11: Install the large pin through the plastic shell and through the magazine. Use your large pin punch to get the pin back through and as before make sure none of the pin is sticking out as this will prevent the base plate from going back on.
Step 12: Install the plastic nut, spring and follower. The follower should be installed so that the flat side is facing forwards and the side which is more curved should be facing the back of the magazine or towards the gas guide rubber.
Step 13: Feed the spring down through the magazine just enough so that the plastic nut is in line with the base of the magazine and then slide the base plate over the bottom of the magazine making sure that the pointy end is installed first.
Step 14: Make sure that the plastic nut is visible through the hole on the base plate, once you can see the plastic nut it means that the base plate is in the correct position and now it's time to treat yourself to a nice drink because the job is complete.